My double pane window project...
My house was built in 1959. And though it has been a great house, like most homes of this era, energy-wise, it's pretty inefficient. In December of 2006 I received a gas bill for $379.56.
I got the idea to add a black mesh to all windows which caught direct sunlight and translated it into heat. The mesh looks just like a screen. This made a big temperature difference:
Fun facts about double-pane windows and their insulative properties.
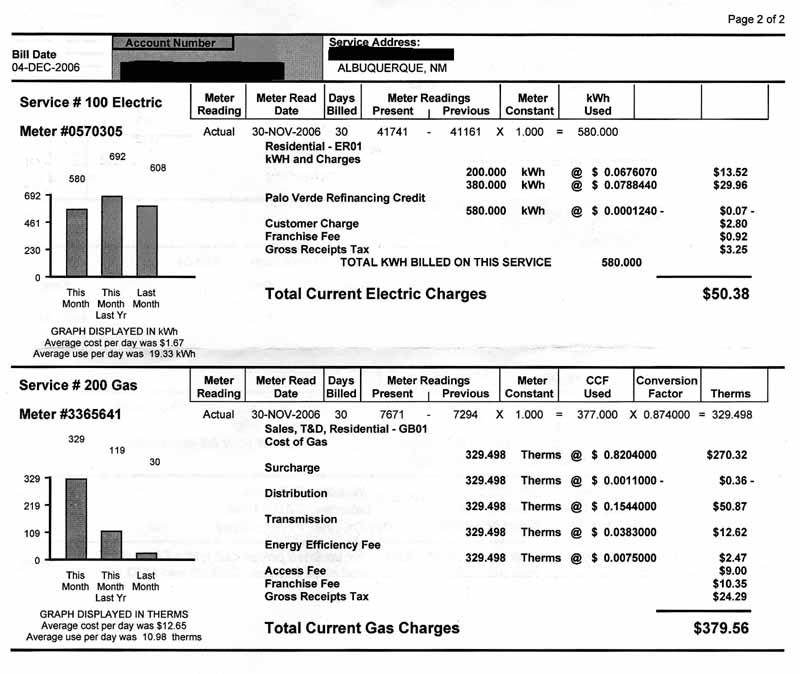
Though, in reality a mistake had been made, the size of the bill gave me a wake up call. I needed to do something about my high gas bills, which routinely were over $200.00. The worst part was that my house was never really warm or comfortable. In an attempt to keep the gas bill down, I kept the thermostat low - usually around 60 degrees. In December of 2006 I decided to do something about it.
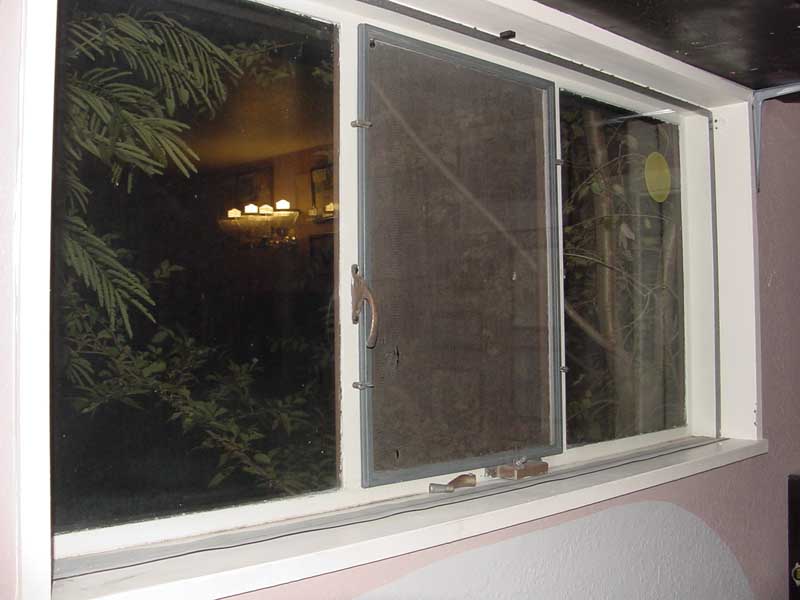
With the exception of having to replace most of the window cranks throughout the house, my windows have always worked well. They're typical 60's crank-style windows with a single pane of 1/8" glass. Because they're so "leaky," they work well in the summer with the swamp-cooler, which actually requires air leaks to work efficiently. This doesn't work out so well in the winter. At certain points during the winter I could actually feel cold air blowing through the windows - especially when temperatures dipped to near freezing and the wind was blowing. How can one possibly keep a house warm with cold air literally blowing through the windows? Something had to be done. The first thing that came to mind was to install double-pane windows.
My neighbor across the street, Jim, had just installed double-pane windows throughout his house. I almost crapped my pants when he said the bill for this endeavor was nearly $10,000.00!!! Holy crap!!! I didn't have that much money laying around, and even if I did, it would take 20 years for the windows to pay for themselves - assuming a $500.00 per year savings, which is a pretty ambitious estimate. $10,000.00, for me, was not a cost-effective investment. I needed a more cost-effective way to cut my heating costs.
Upon examining my windows, I noticed that they had a 1/2" lip around 3 of the 4 sides:
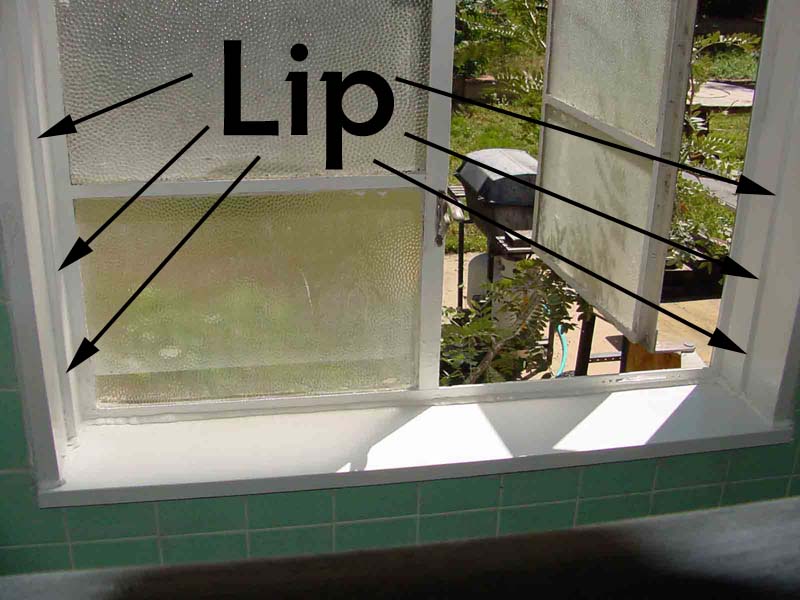
By utilizing this lip I could easily add an additional pane of glass. Of course these panes of glass would have to be a custom made, which always adds up to "expensive" in my book - but certainly not as expensive as Jim's windows across the street! I remembered that an old high school buddy, Robert Uffer, owned a glass/window company called
Wholesale Mirror and Glass.
So I decided to give him a call. Because of the large nature of the glass I was going to need, Robert recommended thicker glass - I believe 3/16". Since Robert's shop is down on Edith Blvd, but his house is in the heights, he agreed to deliver the glass to me. Each day I would measure one of my window panes, call him with the dimensions, and then he would have his guys cut to my specifications. He then delivered each pane and stuck around while I test fitted them. Over the next couple months I did 1 or 2 windows a week. To keep weight down and keep the glass down to a size I could store in the heater closet, I decided to split my larger kitchen and living room windows into several sections. I split the living room picture window into 4 sections, the kitchen into 3. As I installed the 4th and final picture window section, I noticed a very cold breeze coming through the single pane. Once the 4th section was installed, the window was sealed tight. It was amazing the difference the second panes were making.
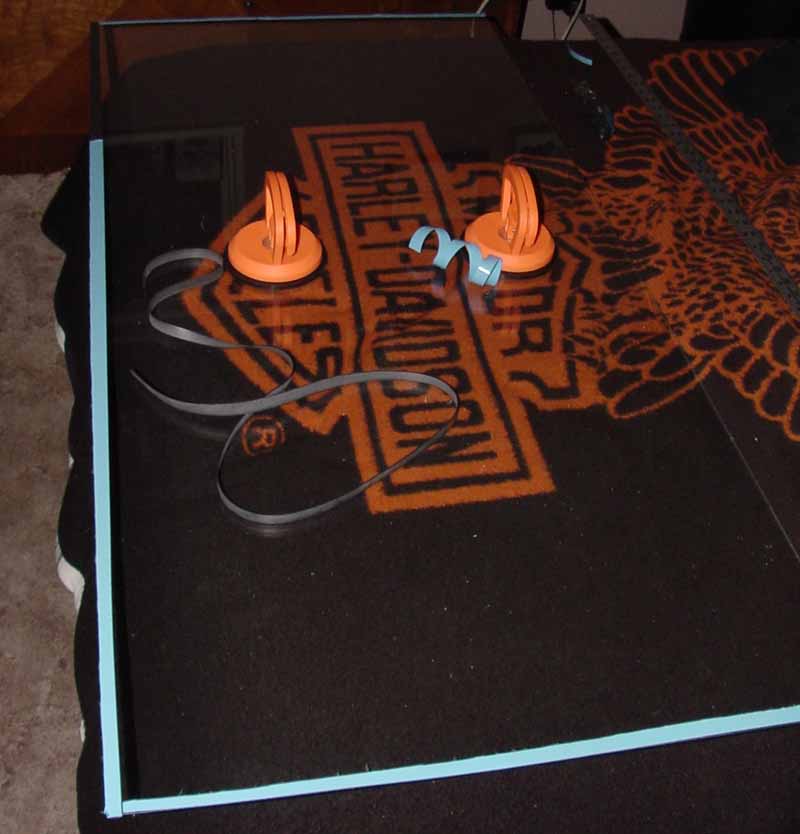
I purchased a pair of suction cups at Harbor Freight for like 9 bucks. I'm surprised at how well these relatively cheap glass holders have worked over the years. In the picture below you can not only see the suction cups, but you can see one of the panes of glass. This pane is for one of my bedroom windows.
At first I tried to apply weather stripping to the glass directly, but this proved to not work very well. I later found a vendor in Great Britain who had white, 1/2" wide weather stripping. For some reason I could not find white in the U.S. I wanted white because my windows are painted white. Black weather stripping stood out like a sore thumb.
Here's a picture of my bedroom window with the second pane of glass installed. I'm glad that this picture shows the old, black weather stripping because you can more-easily see the lip around the window sill. All the black weather stripping has since been replaced with white weather stripping. Since the white weather stripping is essentially invisible, it renders the second pane invisible. Now you really have to look hard to see the second pane of glass:
You may notice that the crank handle has been removed. This is because the glass doesn't fit with the handle in place. It takes 10 seconds to remove and replace the handle. If you look closely, you will notice a small, black, neodymium magnet holding the glass in place at the top. Since all my window panes are made of steel, these neodymium magnets work extremely well. If you look under the bottom edge of the glass, you will notice a rubber strip between the glass and the window sill. This is left over rubber from a roofing project I did years ago. For other windows in the house I cut up old mouse pads and then taped them together to form one, long piece. Their thickness and flexibility proved to make an excellent sealer. Another cool thing about these second panes of glass is you can't even tell they're there. Prior to installation, every winter I clean the windows spotless. Even from 3 feet away its hard to tell that there's a second pane of glass installed. It's pretty kewl.
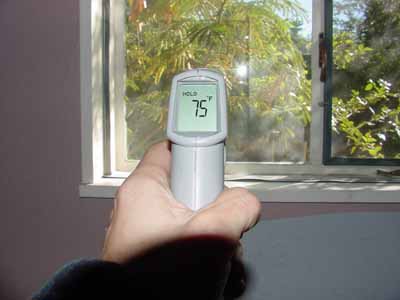
After installing the second pane of glass, I decided to gather some data by taking some temperature readings. I own a laser temperature gun, so getting readings was pretty easy. In the pictures below I show readings on a typical sunny day. The outside temperature was 44 degrees. All temperature readings are inside surface temperatures:
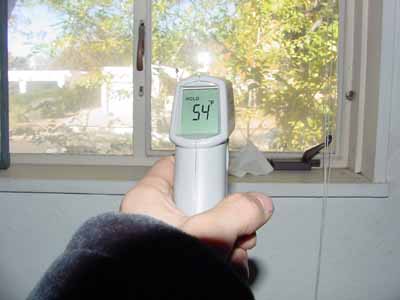
A single pane in the shade.
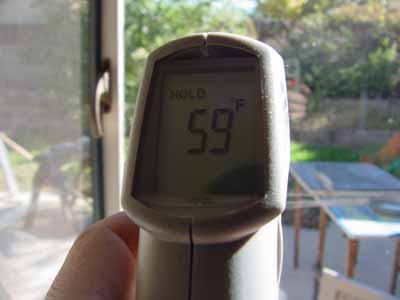
A single pane in the sun.
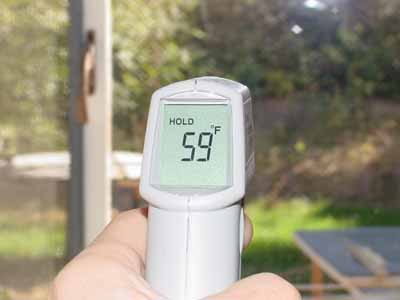
A double pane in the shade.
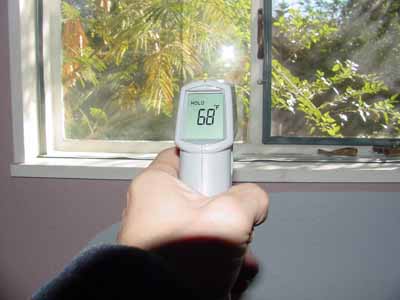
A double pane in the sun.
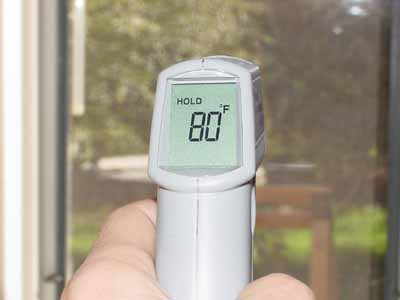
A double pane with mesh in partial sun light.
A double pane with mesh in direct sun light.
As you can see, the mesh made a dramatic difference in surface temperature. The double-pane glass holds the heat in while the mesh actually produces heat.
Parts is parts...
Parts needed for this project were glass, magnets and weather stripping. Total cost for everything was a hair above $650.00. I suspect that, as of this writing, I have already recouped most, if not all, of my investment. This project was a very cost-effective one.
Changing over every season...
One of the caveats of this project has been the amount of work required to change the house from "winter mode" to "summer mode." The glass is heavy and awkward. I have to be careful to not break the glass or some other item with the glass. This semi-yearly changeover would be much easier with 2 people. I honestly don't mind doing it, but others might. It takes about 2 hours twice a year to make the changeovers - well worth the effort in my mind. I like being able to go back to standard, single-pane windows in the summer time. They're much easier to clean than double-pane windows and I like the fact that they crank outward (which tends to catch breezes and direct them into the house), than to slide the windows left to right.
Storage...
I designed the glass sections to fit in my heater closet. This makes really good sense because the heater closet is essentially useless during the summer months anyway. Might as well store a couple hundred pounds of glass in there...<:^)
Why not the bathroom windows???
After much thought, I decided against doing the bathroom windows for 2 reasons:
In conclusion...
Overall, I would guess that I'm saving anywhere from $50.00 - $100.00 per month. The major difference is that the house is always warm and comfortable - at times actually too warm. Where I used to keep the thermostat at 60 degrees or even lower if it got below freezing outside, depending on the time of day, I now routinely keep it from 62-67 degrees. I find that 68 degrees feels too warm in my house. This is a huge difference from always being chilly and having to wear a sweater or even a light jacket to stay warm. Now I wear a sweat shirt and sweat pants and I'm always comfortable.
I hope you enjoyed perusing this page. Please feel free to e'mail me with questions or comments.
This page is up as of October 27th, 2009 - 7:50 PM.
Comments? Corrections? Questions? Please
e'mail me to tell me about it.

All pictures & material Copyright © 2009 Donnie Frank