Remodeling...almost on a whim
I have to thank my friend and fellow musician, Ronnie Sanborn, for planting the remodeling bug in my ear. Ronnie sells real-estate and is an appraiser, so when it came to advice about my house, and increasing its value, I listened.
One evening during a rehearsal we somehow got on the subject of real-estate values and what one could do to increase the value of one's home. My entire home is carpeted, so one night I mentioned to Ronnie that under the carpet resided hardwood floors throughout the entire house (the hardwood runs all the way into the closets). Ronnie emphatically assured me that getting rid of the carpet and exposing the hardwood floors would most definitely increase the value of my home. Though I really have no plans of selling or moving, Ronnie had planted a "project seed" in my head. That seed would fester in my brain like an infectious boil or gaggle of maggots.
Bad weather effects my decision
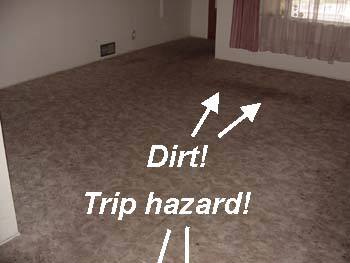
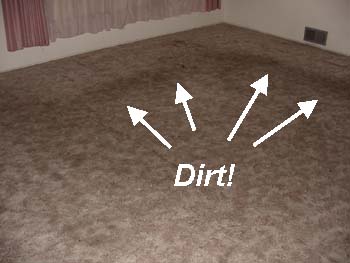
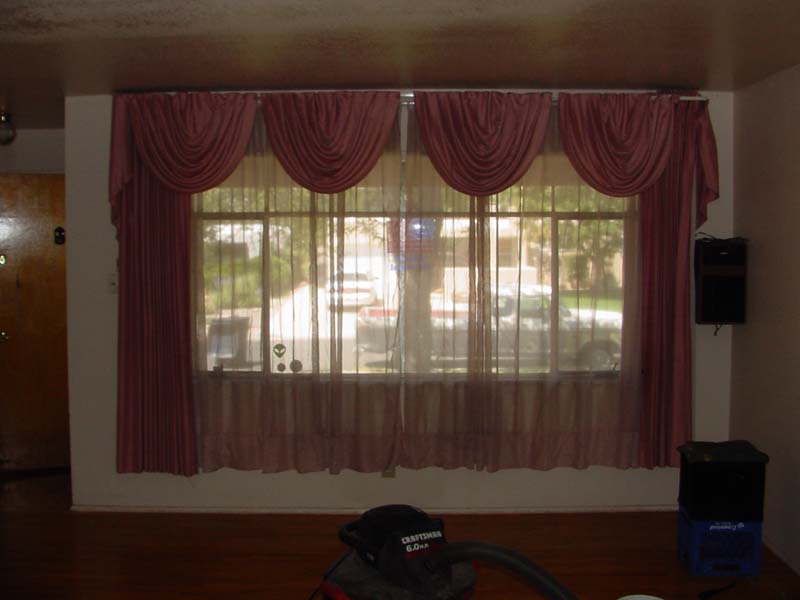
July and August 2006 were particularly precipitous months for Albuquerque. Statistically speaking, the city saw more than 3 times it's normal amount of rain fall. The result was a very humid summer. Though my front and back yards greatly enjoyed the effect of this precipitation, the moist air wreaked havoc with my carpet; especially in the livingroom. The humidity found its way into the very soul of my 20-year-old carpet and made it smell like the wet diaper of an ignored child.
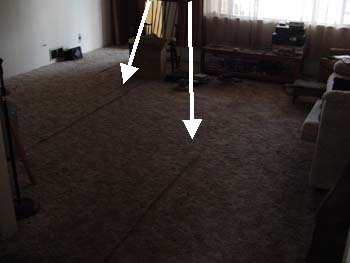
One day, after a particularly wet 3 days, I came home and opened my front door to a horrible, almost overwhelming musty smell. That was it. I had had it. There was no way in hell I was going to live in a house that smelled like the dumpster of a Depends Undergarment testing facility. The thought of cleaning the extremely worn, 20-year-old carpet never even crossed my mind. I knew what I had to do. On an olfactory motivated whim, I migrated my livingroom furniture into the adjoining room, got my utility knife, and cut the carpet into small sections for removal. It was time for action.
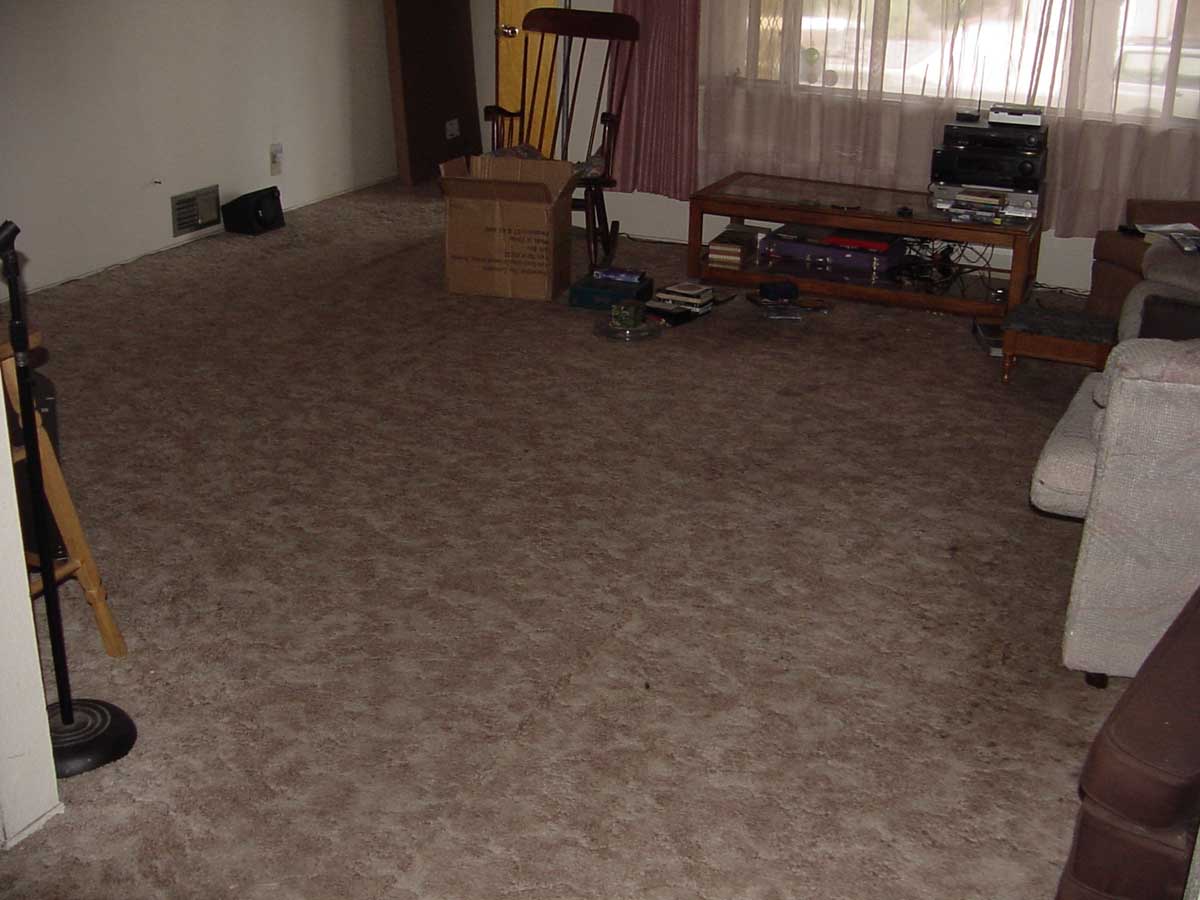
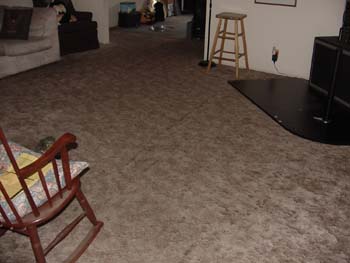
Here's some pictures of the livingroom prior to eviction of the offending carpet:
A diamond in the rough
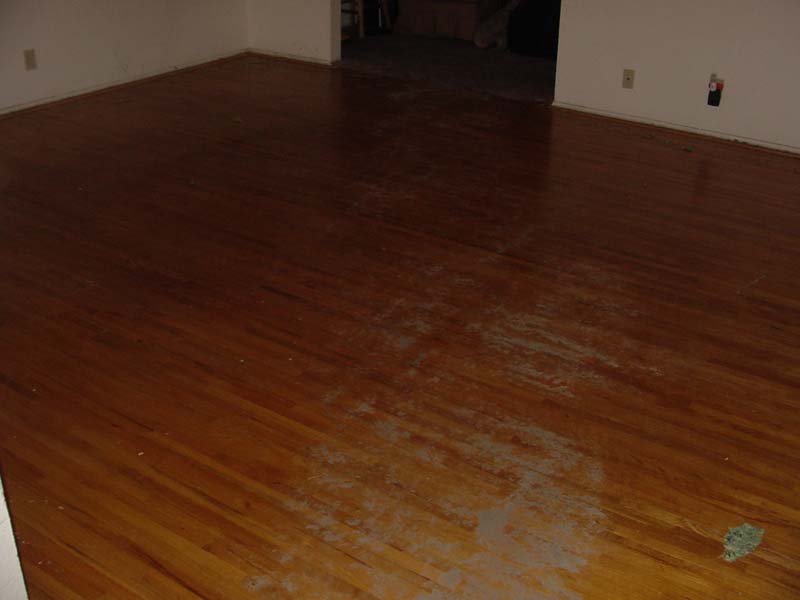
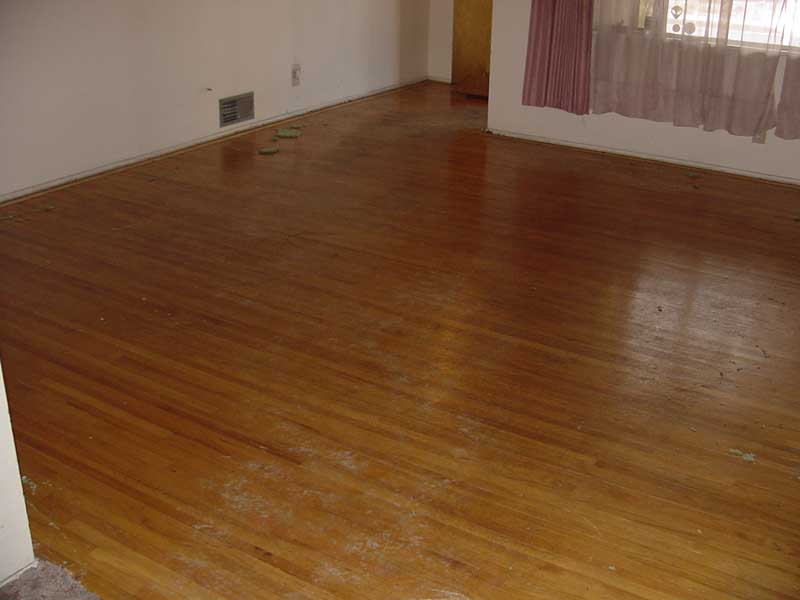
Exposed for the first time in over 20 years, pulling back the old carpet was like finding an old, WWII Harley in a barn in the back woods of Pennsylvania. To my eyes, this was a definite "diamond in the rough."
Removing the livingroom carpet took less than an hour. I was surprised at the ease with which this chore was accomplished.
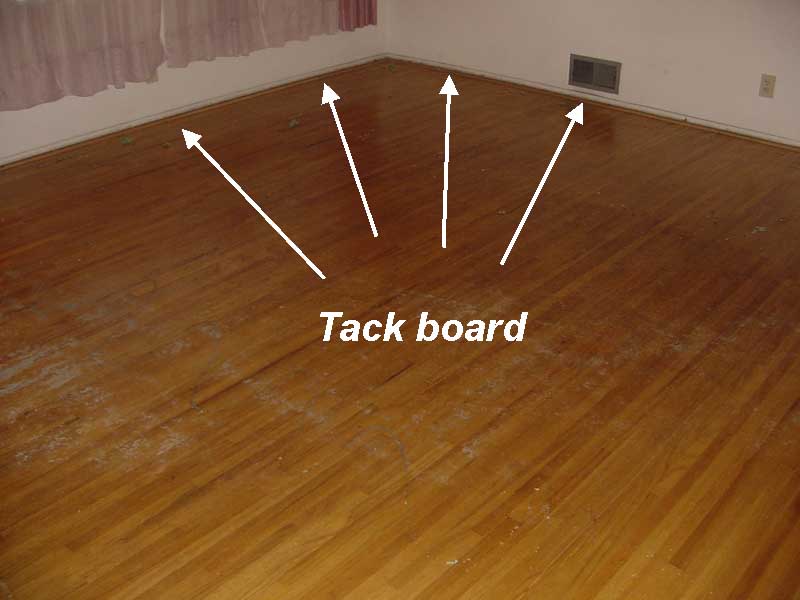
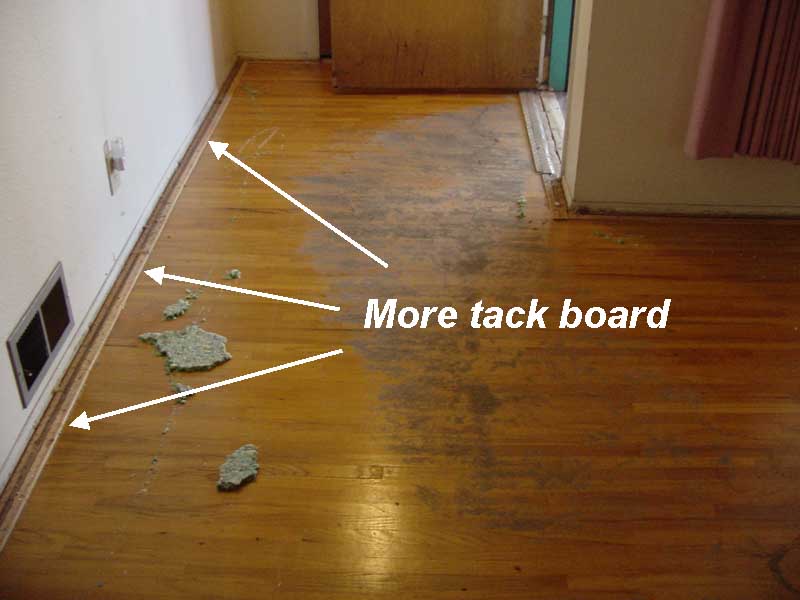
One of the more difficult tasks was removing the tack board, which surrounded the entire livingroom. This vexing chore took an additional hour over and above the time it took to remove the carpet.
As I speculated, the wood was in pretty decent shape. Due to all the beer and crap that had been induced into the carpet over the years, I half expected the floor to have some sort mold or warpage issues. I must say that I was quite relieved when I saw what good shape the floor was in.
In this picture you can see what looks like a stain that may have been produced by a prematurely vomiting caller as she hastily engaged her egress, vehiculated by the arrival of a spouse after a night of ill repute at one of my nefarious, private soirees. In all reality this was merely a gathering of dust that had burrowed its way through the carpet fiber and underlying padding like a maggot digging its way into the flesh of a newly-found host. Unlike the maggot, the dust was easily vacuumed.
To the left you can see a couple chunks of foam, glued to the floor like small patches of hope clinging to the soul of a condemned pedophile while hanging from a rope of impending doom while standing on a chair hastily constructed in one of the non-Union, third-world, Asian nations - its shoddy construction begging for mercy under the gluttonous visage of what is undoubtedly an overindulgent lemming that had made 1 too many trips to the all-you-can-eat buffet at the local Gorge-n-Purge. Removing the foam and glue wasn't a big deal. What was a big deal was the tackboard (seen on the left side of the adjoining photograph). The tack board and accompanying nails clung to the floor like a 30-year-old trust fund parasite clinging to his or her parents' bank account.
Projects beget projects:
After I got the carpet ripped out, it was a no-brainer that I might as well paint the room before I started working on the floor. Since I show movies on the South wall via a projector mounted on the ceiling next to the North wall, it was a no-brainer that I was going to paint the walls ultra white. A couple years ago I had experimented with an accent wall in one of my bedrooms. I liked the result, so I decided to do an accent wall in the livngroom. Since I have no color coordination skills, I figured I'd stick with grayscale. Painting the North wall gray was an easy decision. It was off to Home Depot to buy paint!
Here's a picture of Alison painting the West wall. She was a ton of help throughout this entire project. It's good to have a girlfriend with these kind of skills - like bending over.
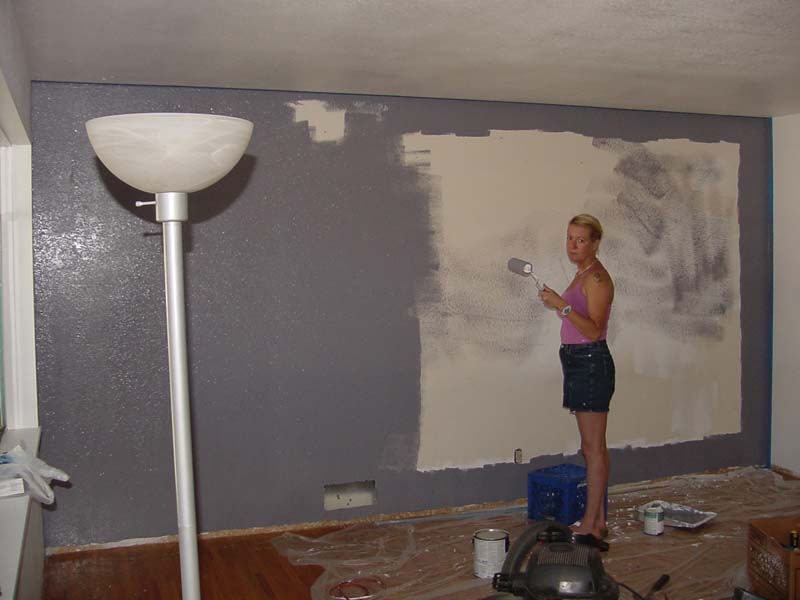
Please note the dejected look on Alison's face. This was because we were both pissed off at the Home Depot "painting expert" for selling us an insufficient amount of paint. I had given the sales rep accurate wall dimensions and against my better judgement allowed him to sell me a quart of paint instead of the needed gallon. As of this picture, the quart can lay dry as a bone. I was forced to go back to Home Depot to purchase more paint. The new sales rep wisely sold me an entire gallon for 5 bucks (this particular brand of paint was over 25 bucks a gallon). Pretty smart move on his part, I'd say.
Projects beget projects:
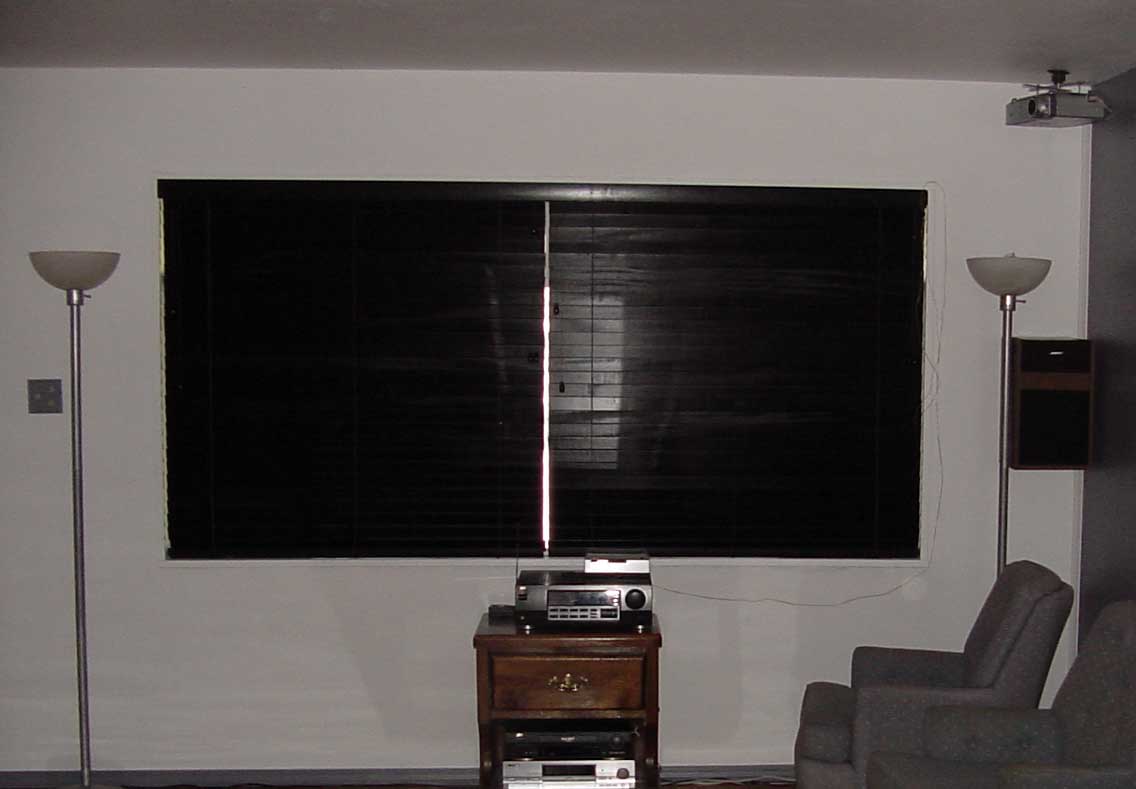
As long as I was taking down the '70's curtains to paint the room, I thought, "I might as well leave them down." I hadn't even touched them since I moved into my home September of 1994. I'd always been afraid of moving them (say...to clean them). I figured I would probably never be able to reinstall them back to their original "fluffy" state. It didn't take much convincing to get rid of the curtains altogether. I decided that in their place I would install some nice blinds. This "refurbish the hardwood floor" job was turning into a complete livingroom remodeling project more and more every day.
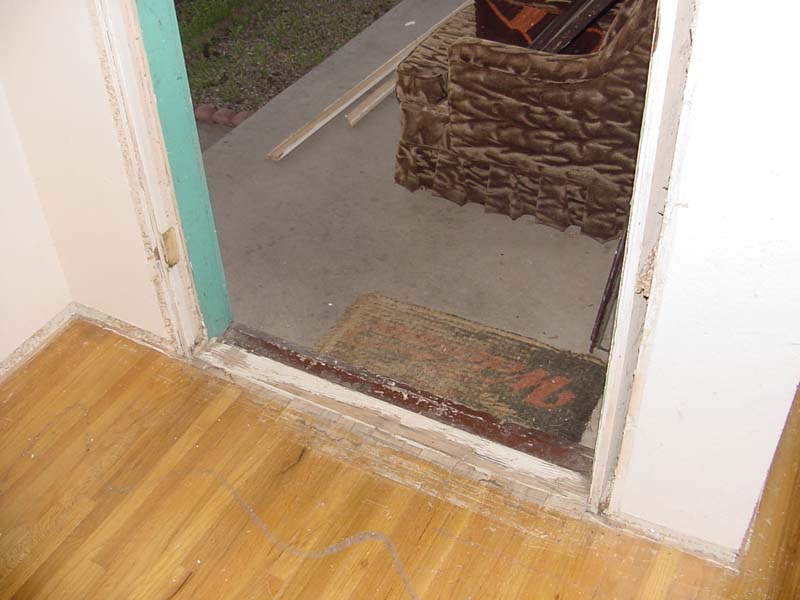
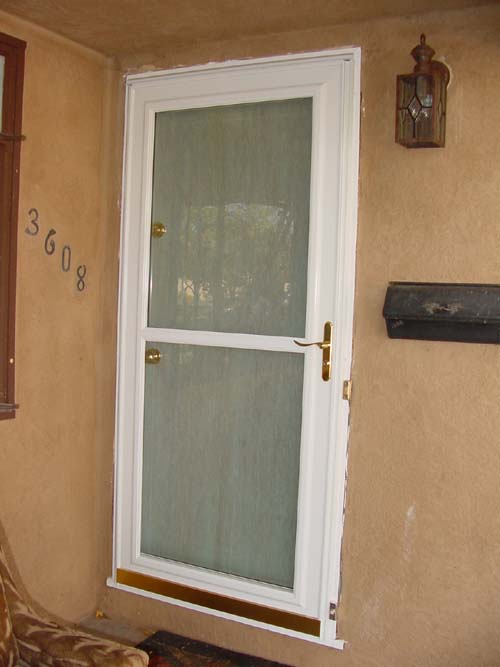
20 years of wear had created a pretty ugly eye-sore in the the door trim and threshold departments. It all had to be replaced. And of course, as you can see by this picture, the door jamb was in desperate need of painting.
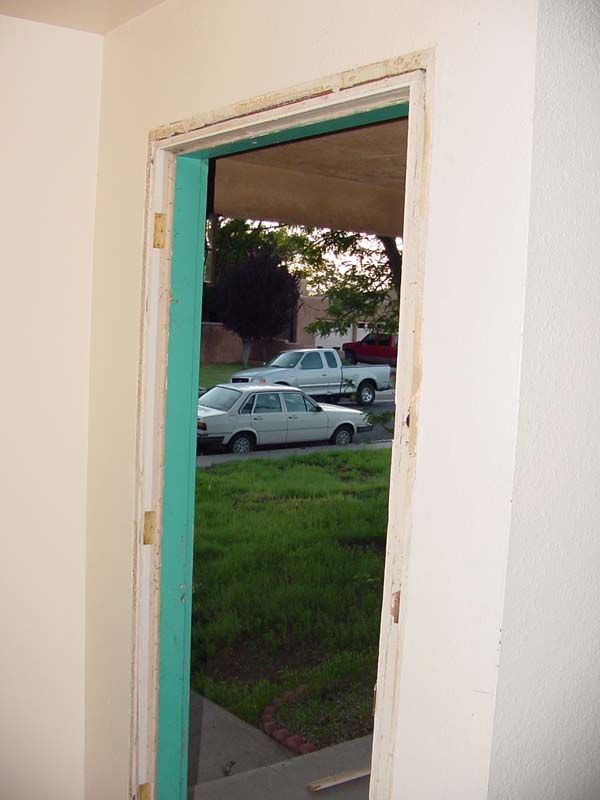
As you can see in these pictues, not only was the door jamb pretty ugly, but the doors were pretty ugly, too. With a huge sigh, I decided to replace both the doors.
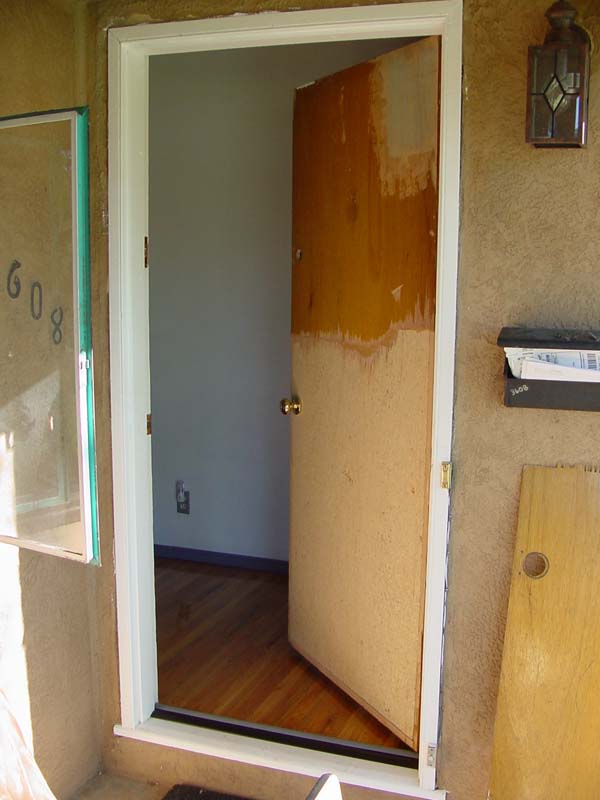
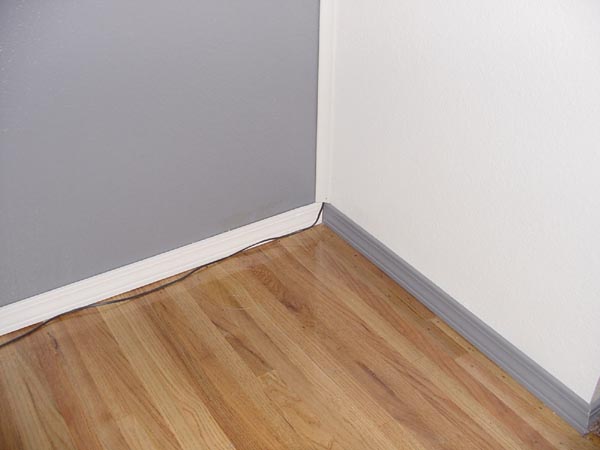
Here's a picture of the door jamb post-painting. Also notice that I replaced the threshold. MUCH improvement.
If you look at the upper-right corner of the door, you might notice that the wood has a slight blue tinge to it. This was a test spot for the "Blue Pearl" stain I was going to try on the new front door. I'm not a color-coordinated kind of guy, so I had to trust Alison's word on this one. I could only hope that she was right, and that the finished product would look good.
Sand-a-floor!
Now that the walls, door jambs and trim were painted, it was time to get started on the floor. If you've ever taken on a hardwood floor project like this, you would know that there are a plethora of options to consider: What type of varnish do you use? Water or oil based? Clear or stained? What finish do you use? Gloss or satin? How many coats to you put down? What's the best brand? What kind of sander do you use? What grit sandpaper do you use?...and on and on. Since I'm a big research buff, and all the houses in my neighborhood have the same wood floors I have, I thought that, in addition to Google, I would check around to see what my neighbors had done to their floors. I had been to all their homes before, I had just never scrutinized their hardwood floors.
Directly across the street lives my neighbor Chris, his wife, Diane, and their son, Jack. I remember when Chris first moved into the neighborhood he had redone the wood floor prior to moving all the furniture in (smart move). Though I'd been over to their house many times, I'd never really closely examined the wood floor. I gave Chris a call and went to check out his floor.
Chris had obviously done a lot of prep-work (read: lots of sanding) and it showed. The floor was nice and flat with no marks. He used a satin finish, no stain, and I think he said he'd put down 2 or 3 coats. The floor looked good.
Next were my neighbors just to the South of Chris; Jim and his son Jimmy. Jim is a great wood worker, so I was curious to see what he had done to his floor. As it turns out the floor had been done prior to him moving in. The thing I noticed about Jim's floor was that it was dark, like it had been stained, and it wasn't shiny (satin finish), and it seemed like not too much time had gone into preparation. I could see many imperfections in the wood. I decided then and there that I was going to budget a lot of time for sanding.
My 3rd and final research visit was done at my next-door neighbor's house, Anthony and Monica. Monica had actually lived there prior with her parents, Wally and...uh...Mrs. Wally for years before they moved out and Anthony moved in. Anthony and Monica were renting the house until Monica finally purchased it earlier this year (2006). But I digress...
Monica and Anthony have a few roommates and dogs, so it was going to be interesting to see how their floor had stood up against these adversaries. As Anthony showed me around he told me how he had prepped the floor with a belt sander. He also told me that he didn't take too much time prepping the floor, and that he was going to redo it someday. This further reinforced my floor preparation paradigm. One thing Anthony did that Jim and Chris didn't was use a glossy finish. I liked the glossy finish. So it was obvious to me that my floor was going to be glossy.
Do lots of sanding.
Glossy finish
No stain
I did Internet research for the rest of my answers. I had used Minwax's "Helmsman Oil-based Glossy Spar Polyurethane" on a couple projects in the past and was pretty pleased with the results. However, this was a floor. People were going to be walking on it. My thinking was that I would probably want something more durable. As it turns out, the Helmsman stuff was exactly what was recommended. I talked to the Home Depot guy about the difference between oil and water-based products. He said that water-based finishes clean up easier (the brushes, not the actual floor), didn't smell as bad, and dried quicker, but weren't as durable. I could throw brushes in the trash. I didn't care about the smell (it would be gone in a month). And I didn't care about drying time. I was in no hurry. I knew I was going to be "stuck" with this floor for a long, long time, so I quickly decided that "more durable" was what I wanted. The sales rep assured me that the Minwax product I was looking at was about the most durable in the industry. At 32 bucks a gallon, it had better be!
Here's what I now had:
Do lots of sanding.
Glossy finish
No stain
Use Minwax, Oil-based, Helmsman Spar Urethane
Finding a sander:
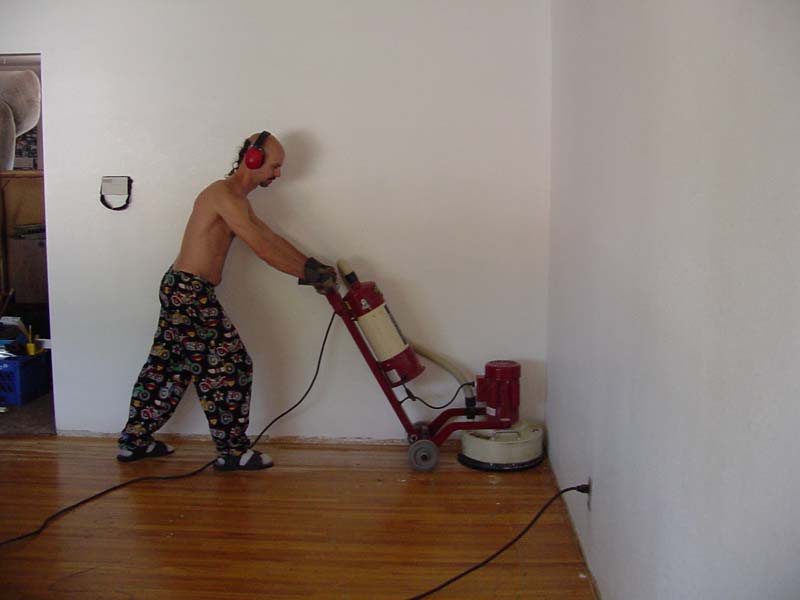
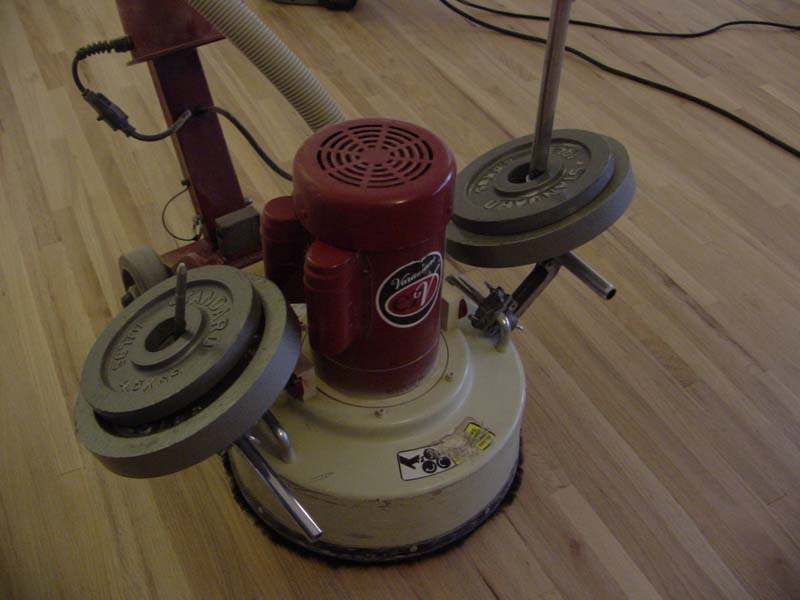
Sanding the floor was, by far, the most time consuming part of this venture. Between Alison and myself, we spent roughly 40 man-hours sanding. Prior to starting this project, I knew I was going to be sanding a bunch, so I wanted to make sure I had the right equipment. I kind of got lucky on the sander deal because I didn't do much research. I called Lowes, and then I called Home Depot. The Lowes sander was cheaper, closer, and avaialable, so I went with that one. If you do a project like this you MUST rent a floor sander. The time it saves is well worth the rental fee. Not only does the sander sand, but it also has a powerful vacuum that pulls up the saw dust. I was pretty impressed with the sander. Pushing the sander around was not much harder than pushing around a vacuum. Unfortunately, as you can see in this next couple pictures...
...the floor sander wasn't cutting deep enough. Over the years some of the wood slats had sunk into the floor. I knew that if I had just left the floor in this condition, and then polyurethaned over it, I would not only be dissatisfied with the uneven color, but I would probably be dissatisfied with the uneveness of the floor. Indeed, I was going to have to break out the belt sander and even out the floor by hand.
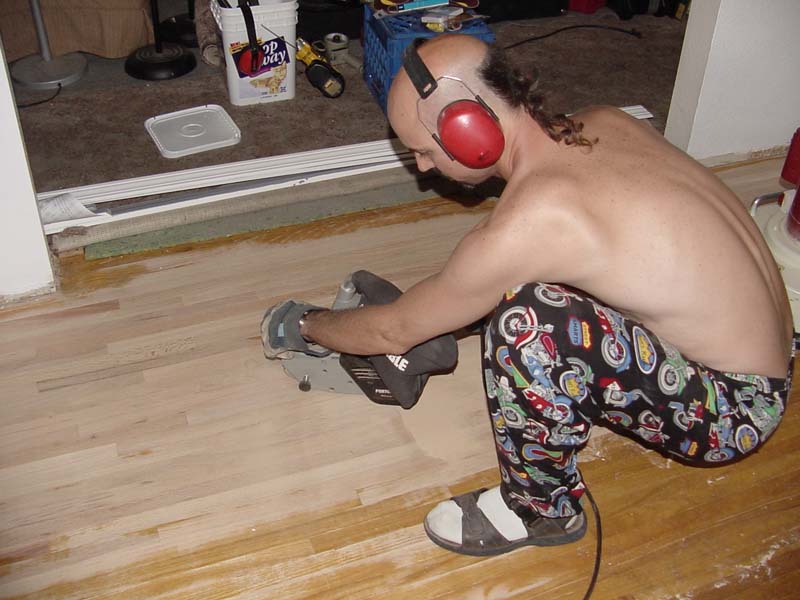
Using the belt sander was NOT easy work. Since my floor is maple (according to my woodworking expert neighbor, Jim) it was extremely tough to sand. Maple is a very hard wood. At first I started off with a 120 grit sanding belt, but eventually went down to a 50 grit. I needed something that was going to cut. The 120 grit seemed to just polish this VERY hard wood. I got overzealous in some parts of the floor and consequently caused myself a bunch of extra work with the floor sander. For the most part I was able to get the floor pretty darn even, with just a few "blemishes" showing up here and there. One has to really look hard to find them.
Here's a little trick I did to speed up the sanding process. Don't ya just love rental equipment?
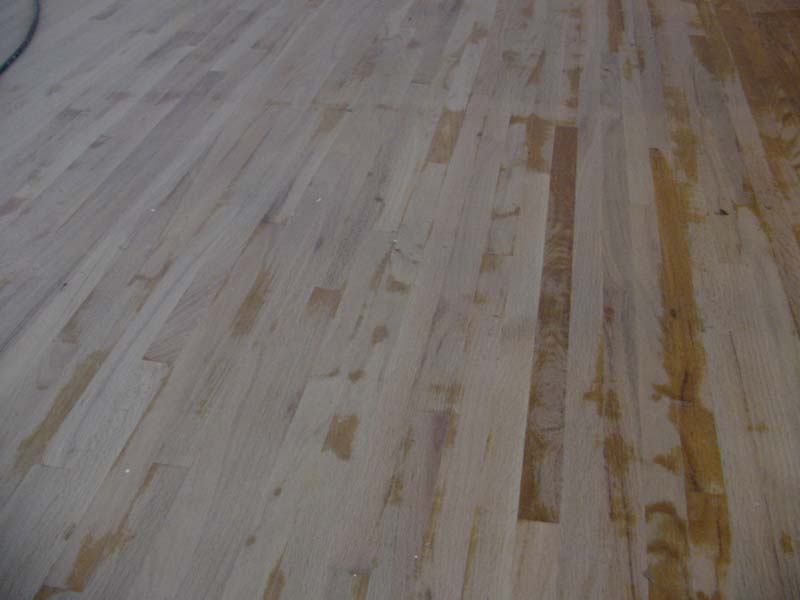
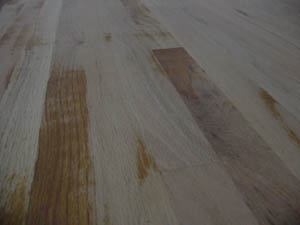
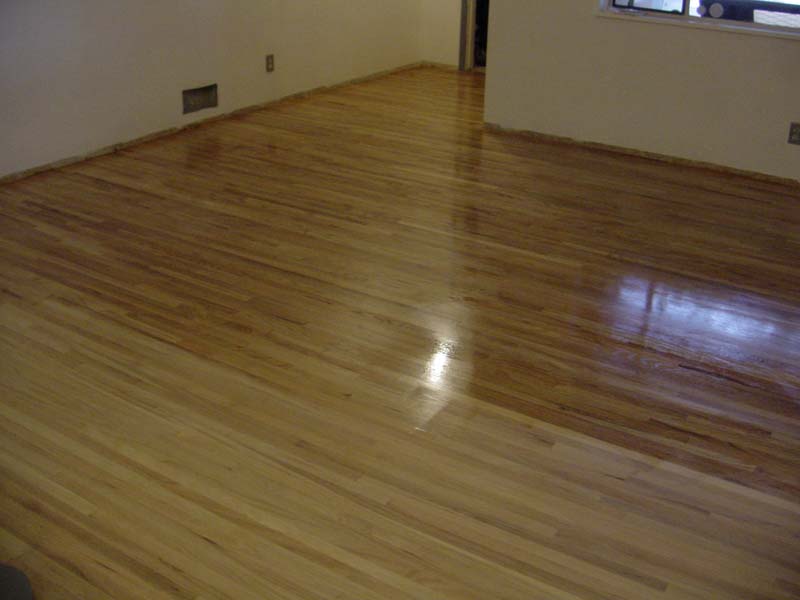
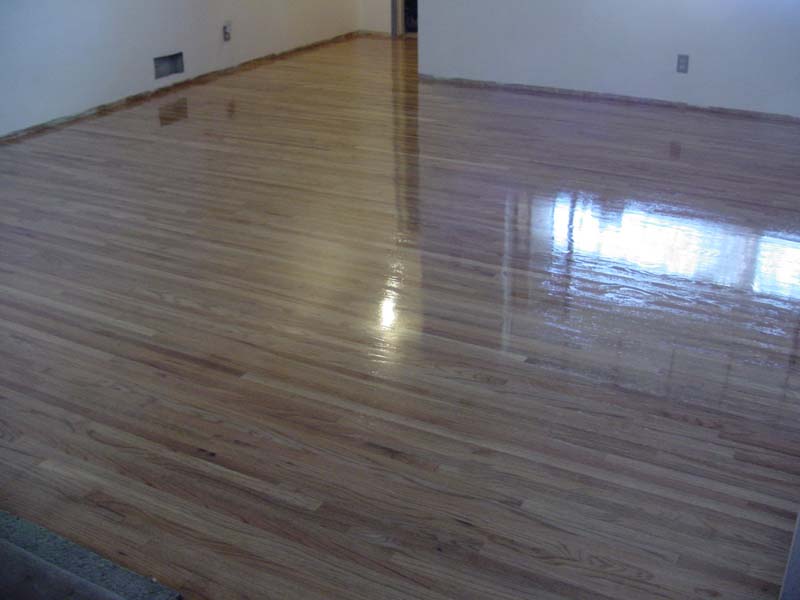
Here are some pictures post-sanding. The floor was starting to look pretty good at this point.
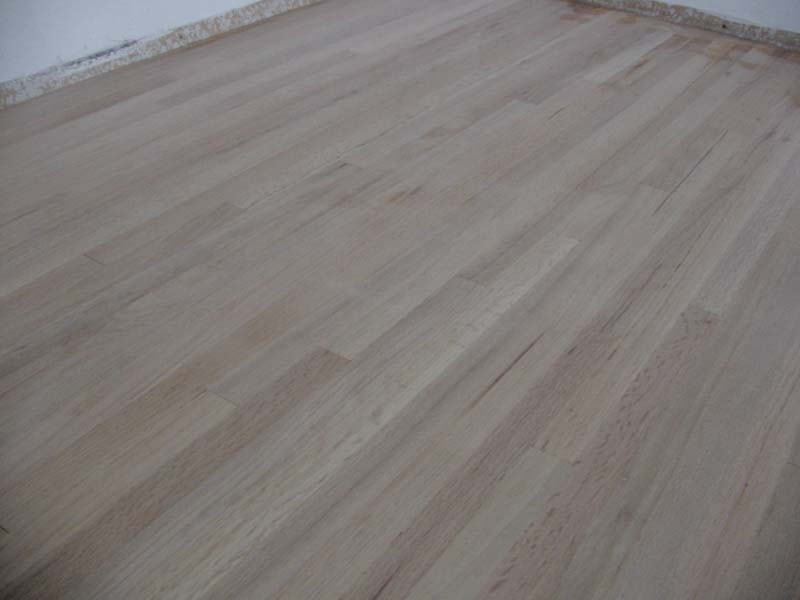
This is the result of roughly 40 hours of sanding.
Here's a picture halfway though the first coat of polyurethane. You can see the dividing line between varnished and unvarnished flooring.
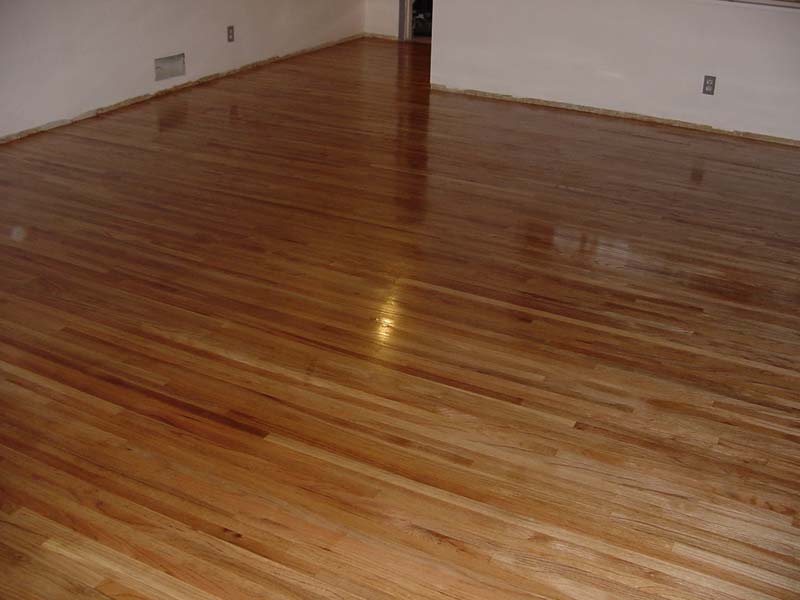
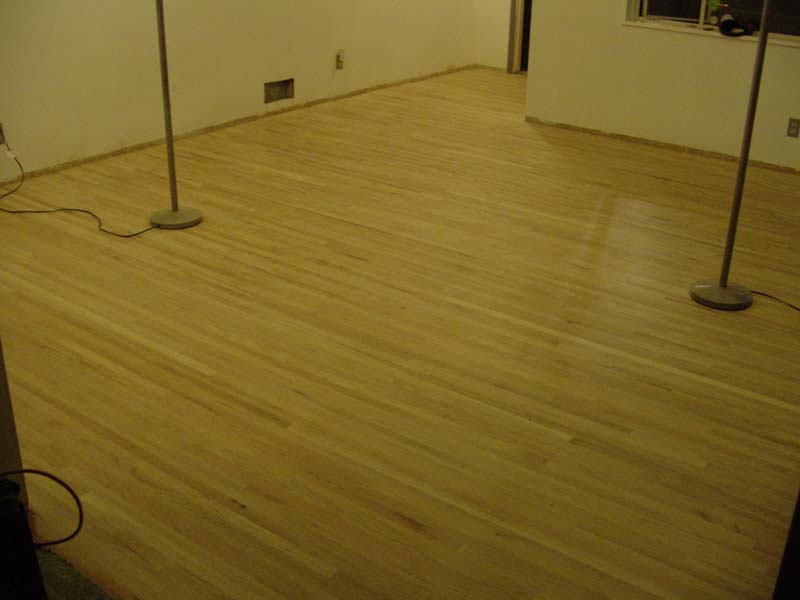
Here's the floor with the completed second coat.
And here she is after the 3rd coat.
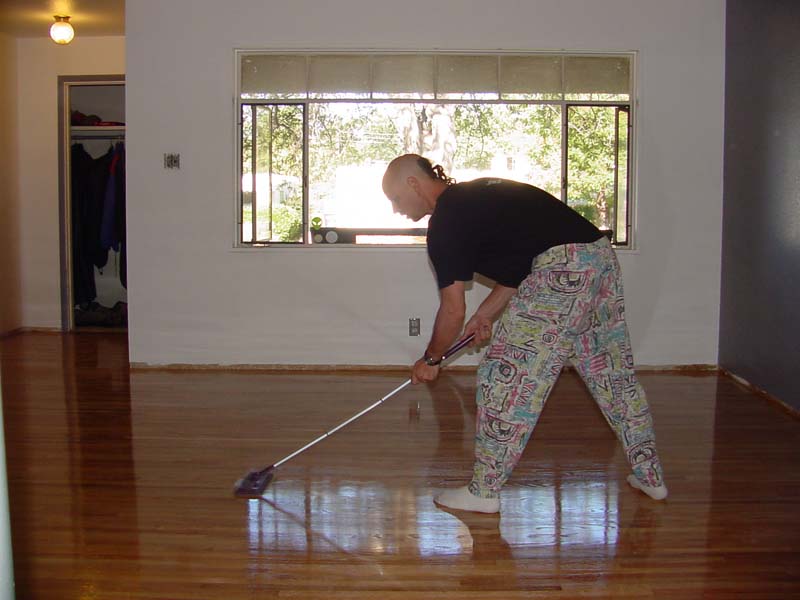
Between coats I taped sandpaper to a Swiffer "mop" to facilitate sanding the floor between coats.
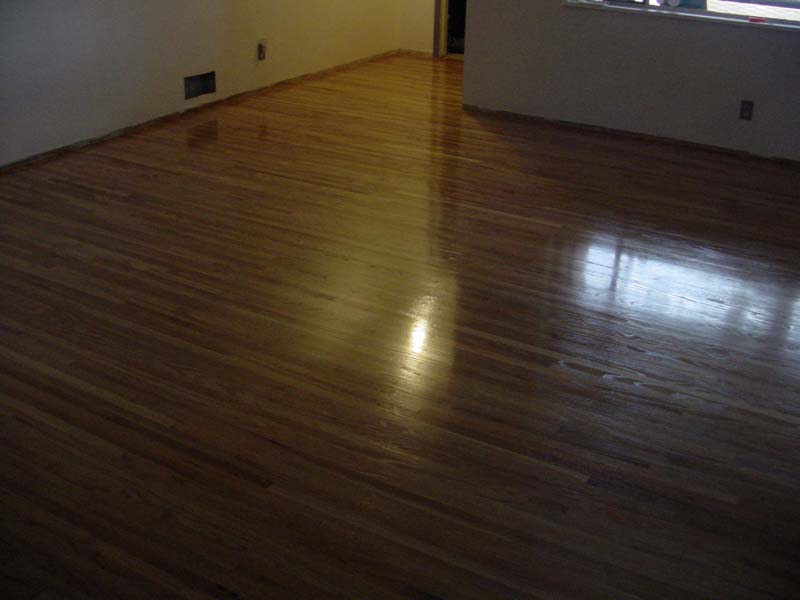
Here; the 4th and final coat.
Baseboards!
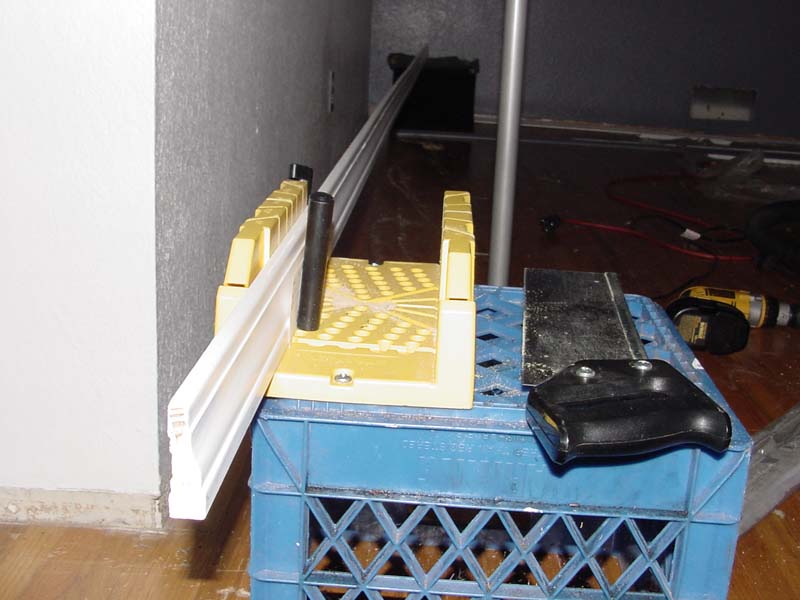
The next thing to tackle was baseboards. I decided to go with a slightly taller and deeper baseboard so as to cover my painting and sanding mistakes. I painted all the baseboards grey, accept for the baseboards against the grey wall, which were left white. The contrast is pretty kewl. The white strip of wood going up the wall conceals my home theatre speaker wire.
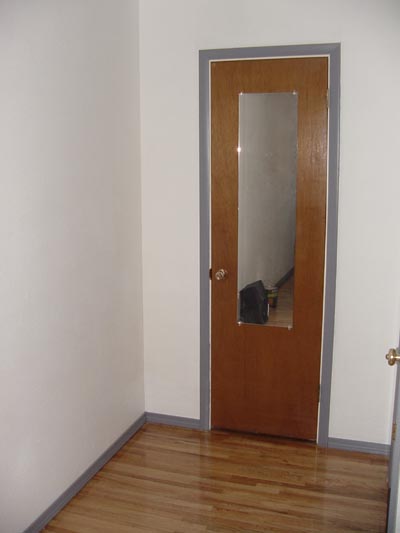
New Doors!
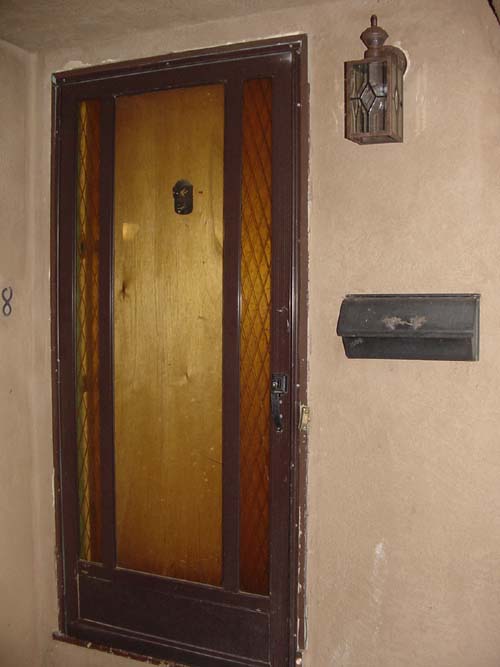
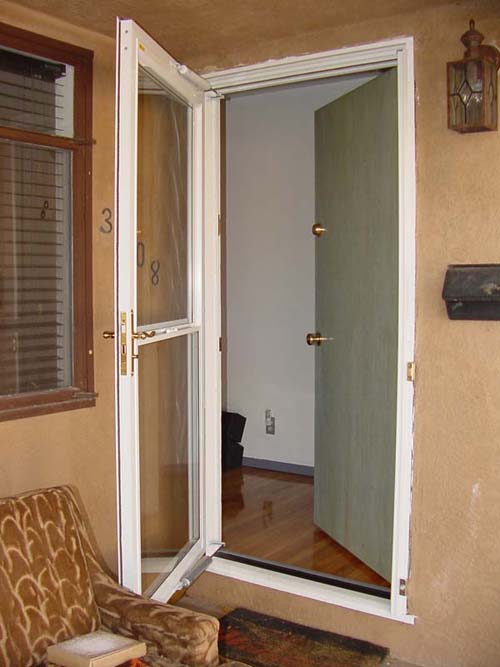
Now that the baseboards were done, I examined the front doors. My front door was old, scratched up, and delaminating. The storm door was old and dilapidated. I thought about simply refurbishing the old door, but with a new wood slab costing only 52 bucks at Lowes, I said, "Screw it," and purchased the new slab. The storm door was in pretty bad shape, too.
While shopping for the main door I passively took a look at storm doors. The good news was that I found this really kewl storm door with a glass window that was attached to a screen that rolled down as the window was pulled down. When one pushed the window up the screen would roll up into a housing at the top of the door. Raising the window renders the door weather tight. Pretty kewl invention in my humble opinion. The only problem was that this mechanism seemed kind of complicated to me. However the saleman pointed out to me that the door had a lifetime warranty. So what the heck...might as well get it. The bad news was the price; $285.00...yikes. I figured, "Oh well...this door's going to be around for a looooooong time. Might as well go for it."
I knew that the new main door was going to be a bit difficult to work with because it weighed so much. Being solid wood, it weighed pretty close to 100 lbs. The storm door, on the other hand, was going to be easy to install because the box boasted, "Installs is 4 easy steps." I guess I shouldn't be so gullable. The storm door was actually a PITA to install. As I was drilling my 4th or 5th hole in the storm door at a precarious angle, I reminisced back to a scene from the Rodney Dangerfield classic, "Back to School." In the movie there's a scene where Rodney's character, Mr. Melon, is taking an important test which is administered by this pompous professor who obviously doesn't like Rodney's character. They're both sitting in this large room along with a panel of 10 or so other faculty members that look like the Spanish Inquisition. It's the big moment...the big test. Rodney is obviously very apprehencive of the scholastic challenge that lies before him. The professor leans down and says, "I have only one question for you, Mr. Melon..." There's a pause as Rodney sighs a sigh of relief thinking that this is going to be easy...like installing my storm door. "...in 47 parts." My storm door was much the same way, "Installs in 4 easy steps!...with 47 parts!" I digress...
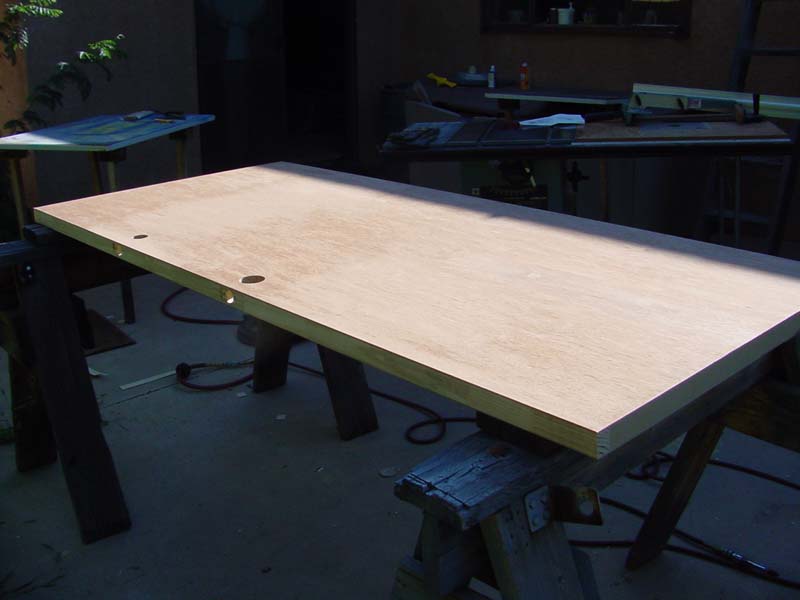
I have taken on a few wood projects in my day, but never a door from scratch. A good carpenter will take measurments, build something to spec., and then install it. Unfortunately I'm not a good carpenter. Here was my method:
Test fit the door: Physically try to "jam" it in the door jamb
If door doesn't fit (and it didn't): Guess how much smaller the jamb is than the door, trim door to fit jamb (fortunately I have a really nice Delta table saw for this)
Test fit again: If door still doesn't fit, go back to step 2. If door fits, go on to step 4.
Using the old door as a template, drill holes and make mortise cuts to facilitate mounting the old hardware
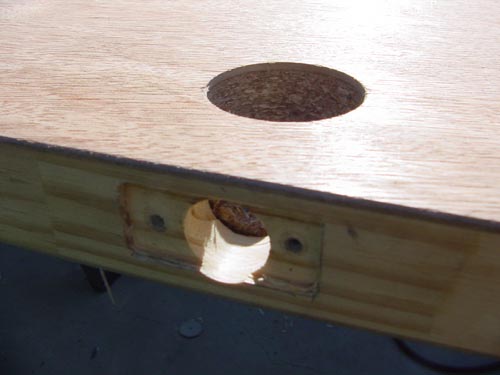
Again, using the old door as a template, make mortise cuts in door for the new hinges
Stain and varnish the door (used the same Minwax stuff I used for the floor)
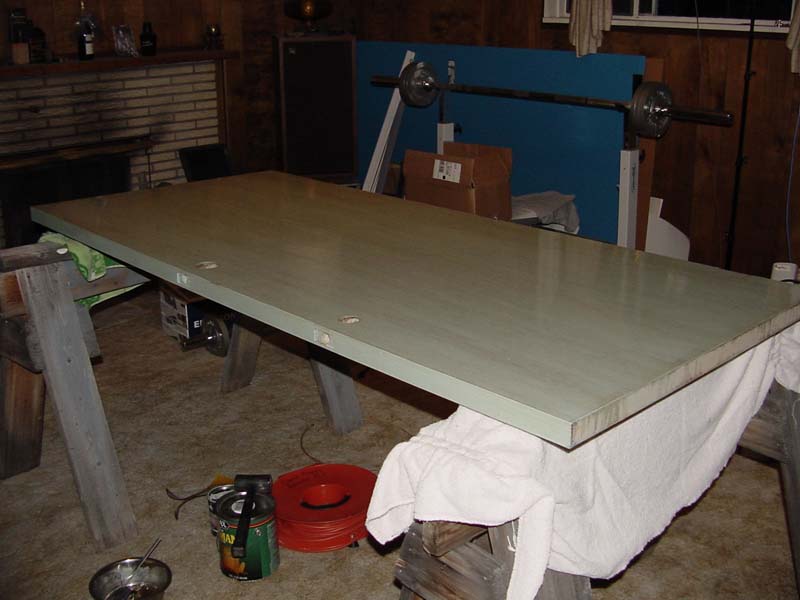
Install new main door (heavy pain in the butt) and then install the new storm door in 4 easy steps (47 parts)
One last thing to do
Remember those curtains? Well those had to be replaced with something. While I was at Lowes picking up my storm door, I figured I might as well order some new blinds. The nice sales lady talked me into nice wood blinds instead of the cheap, cheezie blinds I had picked out for myself. As you can see in the picture below, the wood blinds look pretty good. Like the storm door, the wood blinds were encumbered with a complicated "blinding" mechanism. Unlike the storm door, the blinds were pretty easy to install. Like the storm door, the blinds came with a lifetime warranty. Also, like the storm door, these suckers were expensive (close to 300 bucks). But...they look good and they work well...much better than those curtains, so I won't complain.
Pictured below is the North wall. No decorative project is complete without at least one Harley-Davidson pillow. The Pluto pillow was a gift and is actually pretty comfortable to sleep on. I purchased the paintings in Korea. I got to watch the artist put the finishing touches on these. I purchased them a week later (after they had dried) and shipped them back to the U.S. I know that they're not Van Gogh, but I like them. I've been told from several artists that that's really all that counts. I tend to agree with them. I "decorated" this livingroom to be functional and uncluttered. "Function before form" is what I always say...okay...well...I don't LITERALLY say it...and I don't LITERALLY mean it, but I believe that point should remain clear.

Click on image to enlarge
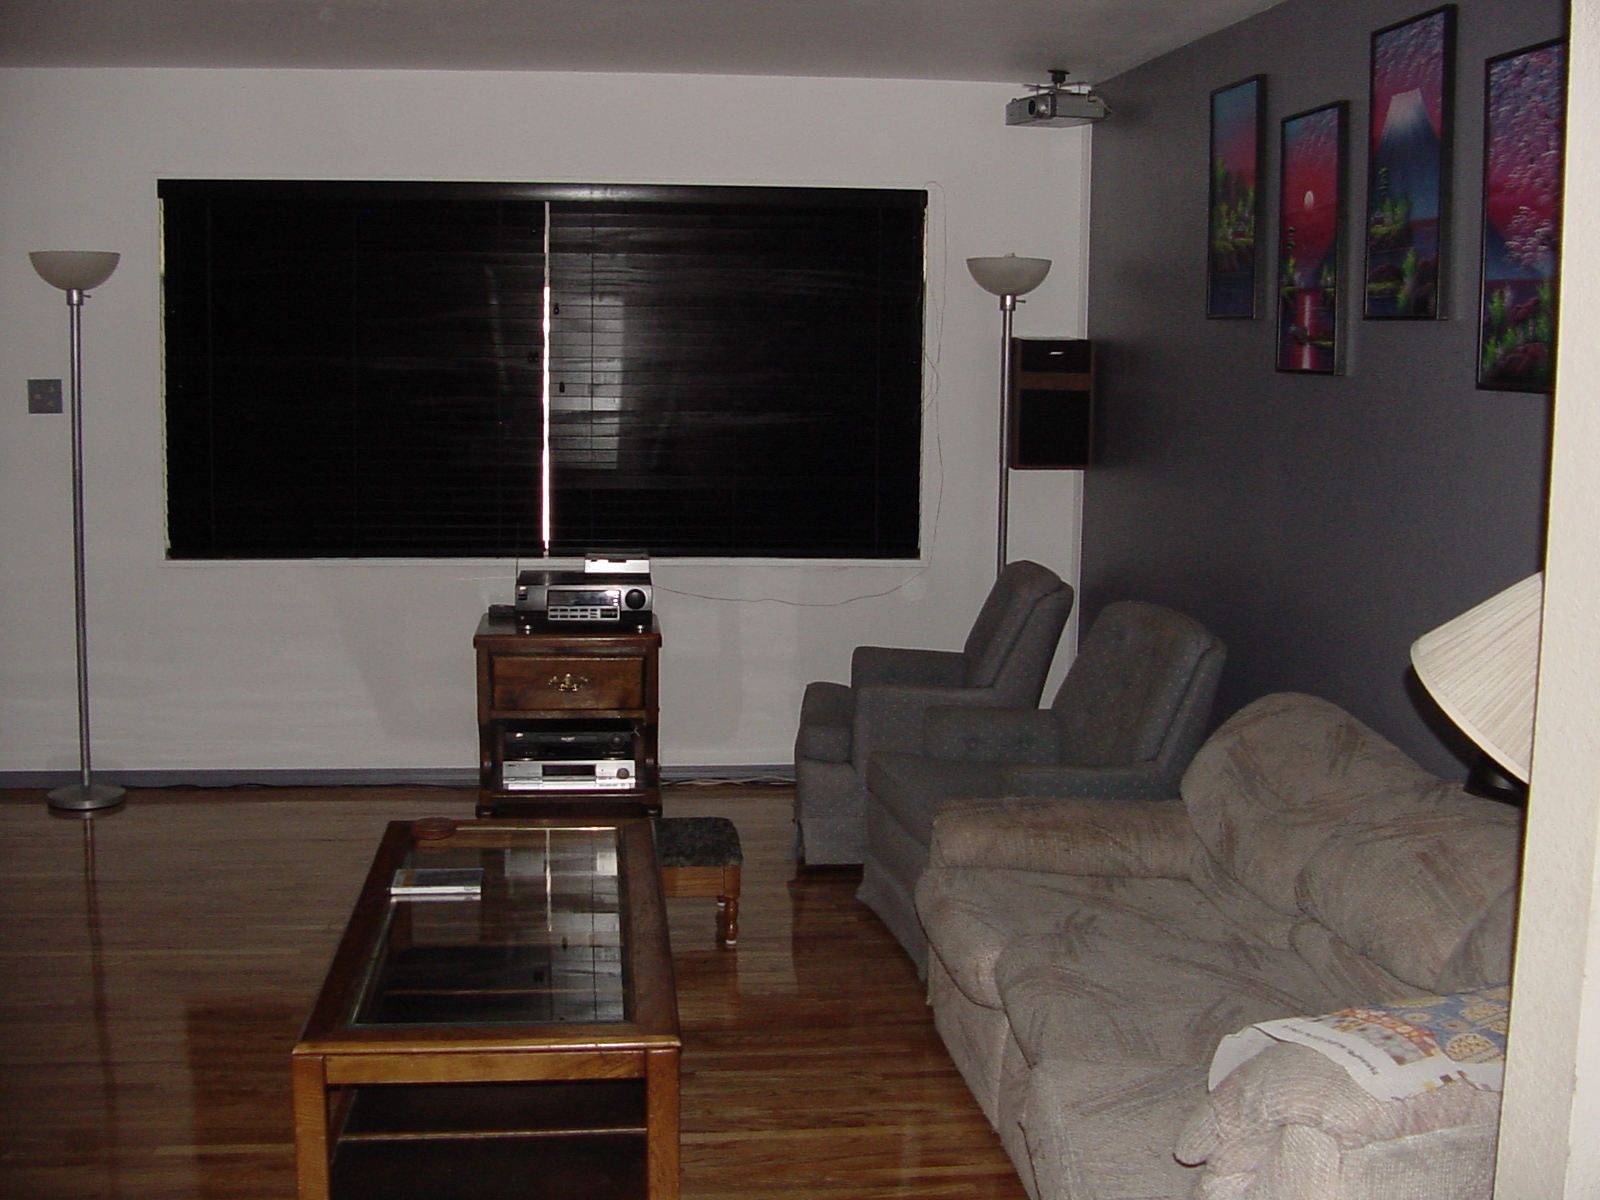
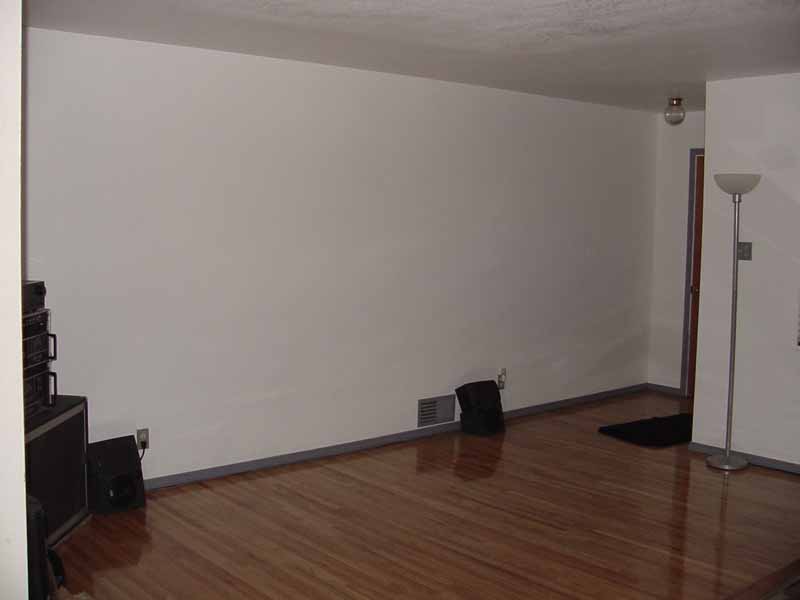
Pictured below is the South wall. You will notice the lack of a television. This was done on purpose. I never watch T.V. so I didn't want the clutter. The speakers on the floor are there for my home theatre (for occasionally watching movies). However the home theatre also doubles as a radio or a CD player if I wish.
Click on image to enlarge
So ends the livingroom remodeling saga. Of course, now the rest of the house looks like crap. Since projects beget projects, the next floor project will be the hallway and music room. Soon to follow will be another web page highlighting that saga. Soon after that will I will probably refurbish the bedroom floors and then the weight room floor. Give me about a month to get started on "phase 2" (hallway and music room).
This page is up as of October 30, 2006 - 3:PM. It was updated August 9th, 2007 - 9:40 AM.
If you have any questions, comments or suggestions, please

E'mail me
Go back to my
"Projects"
page


All pictures & material Copyright © 2006 Donnie Frank
|