Starter problems...
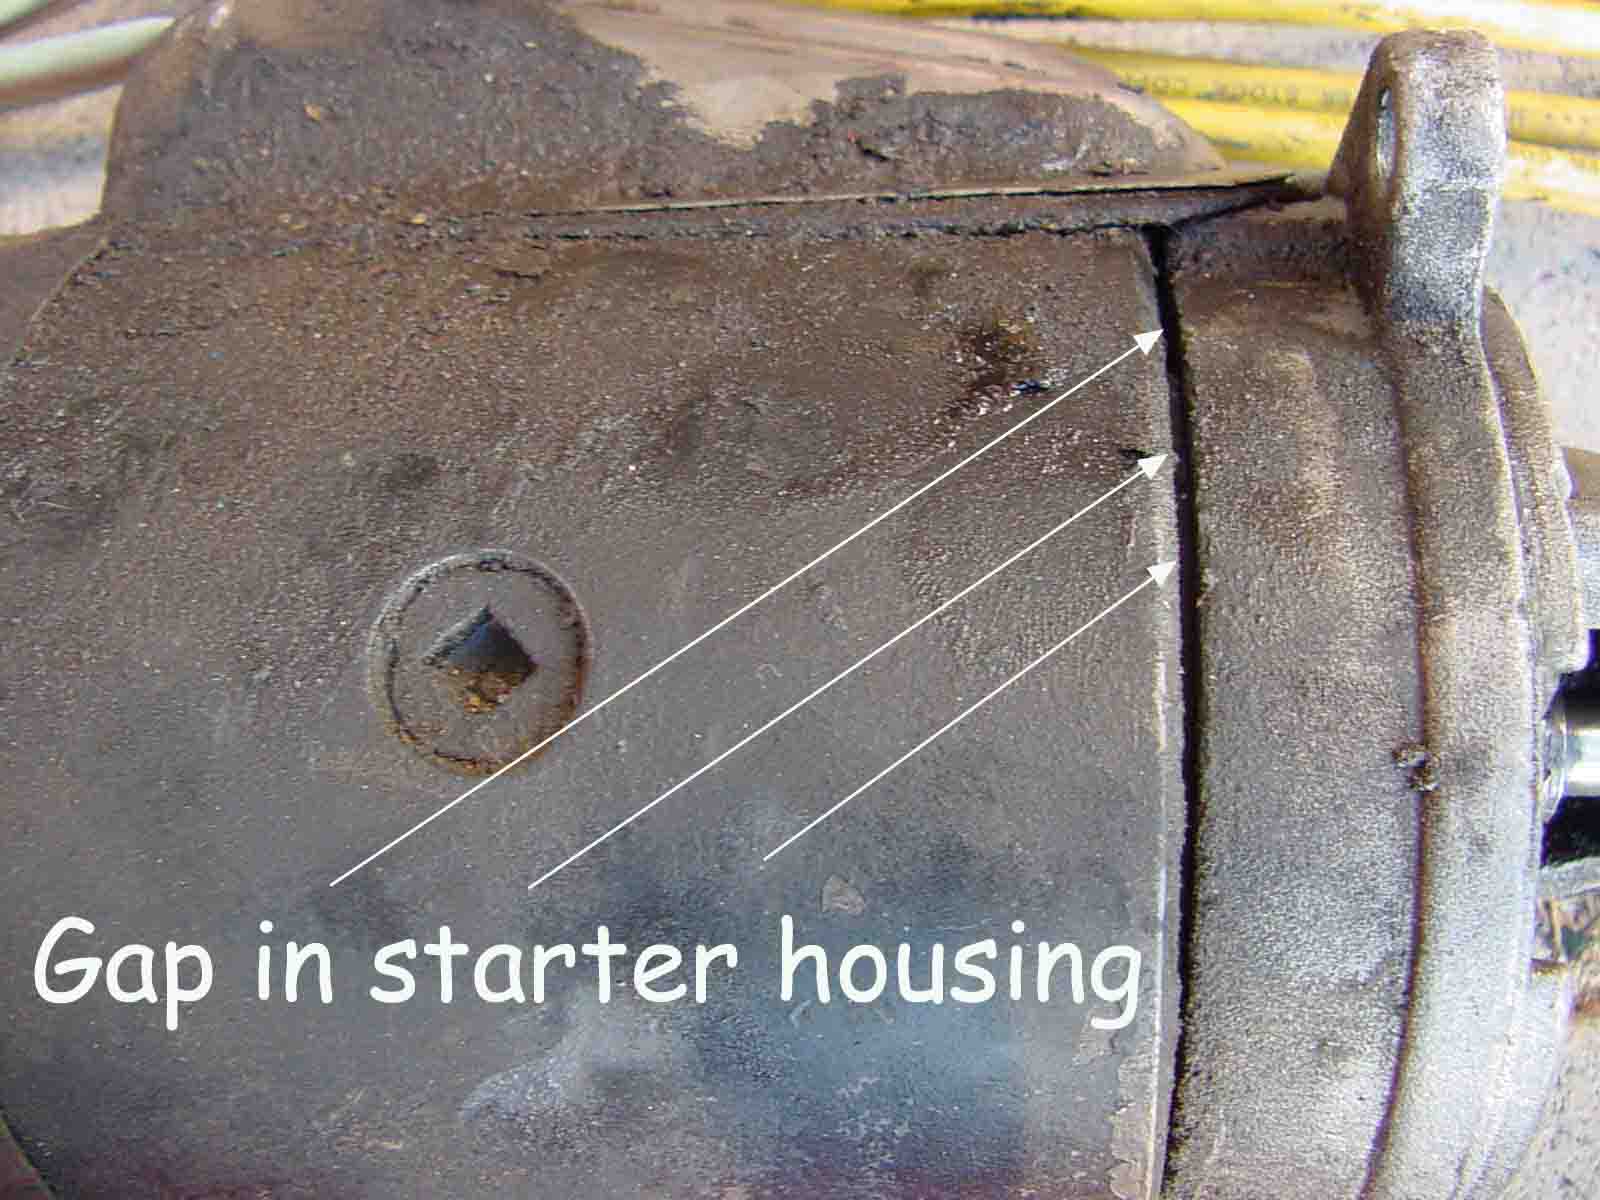
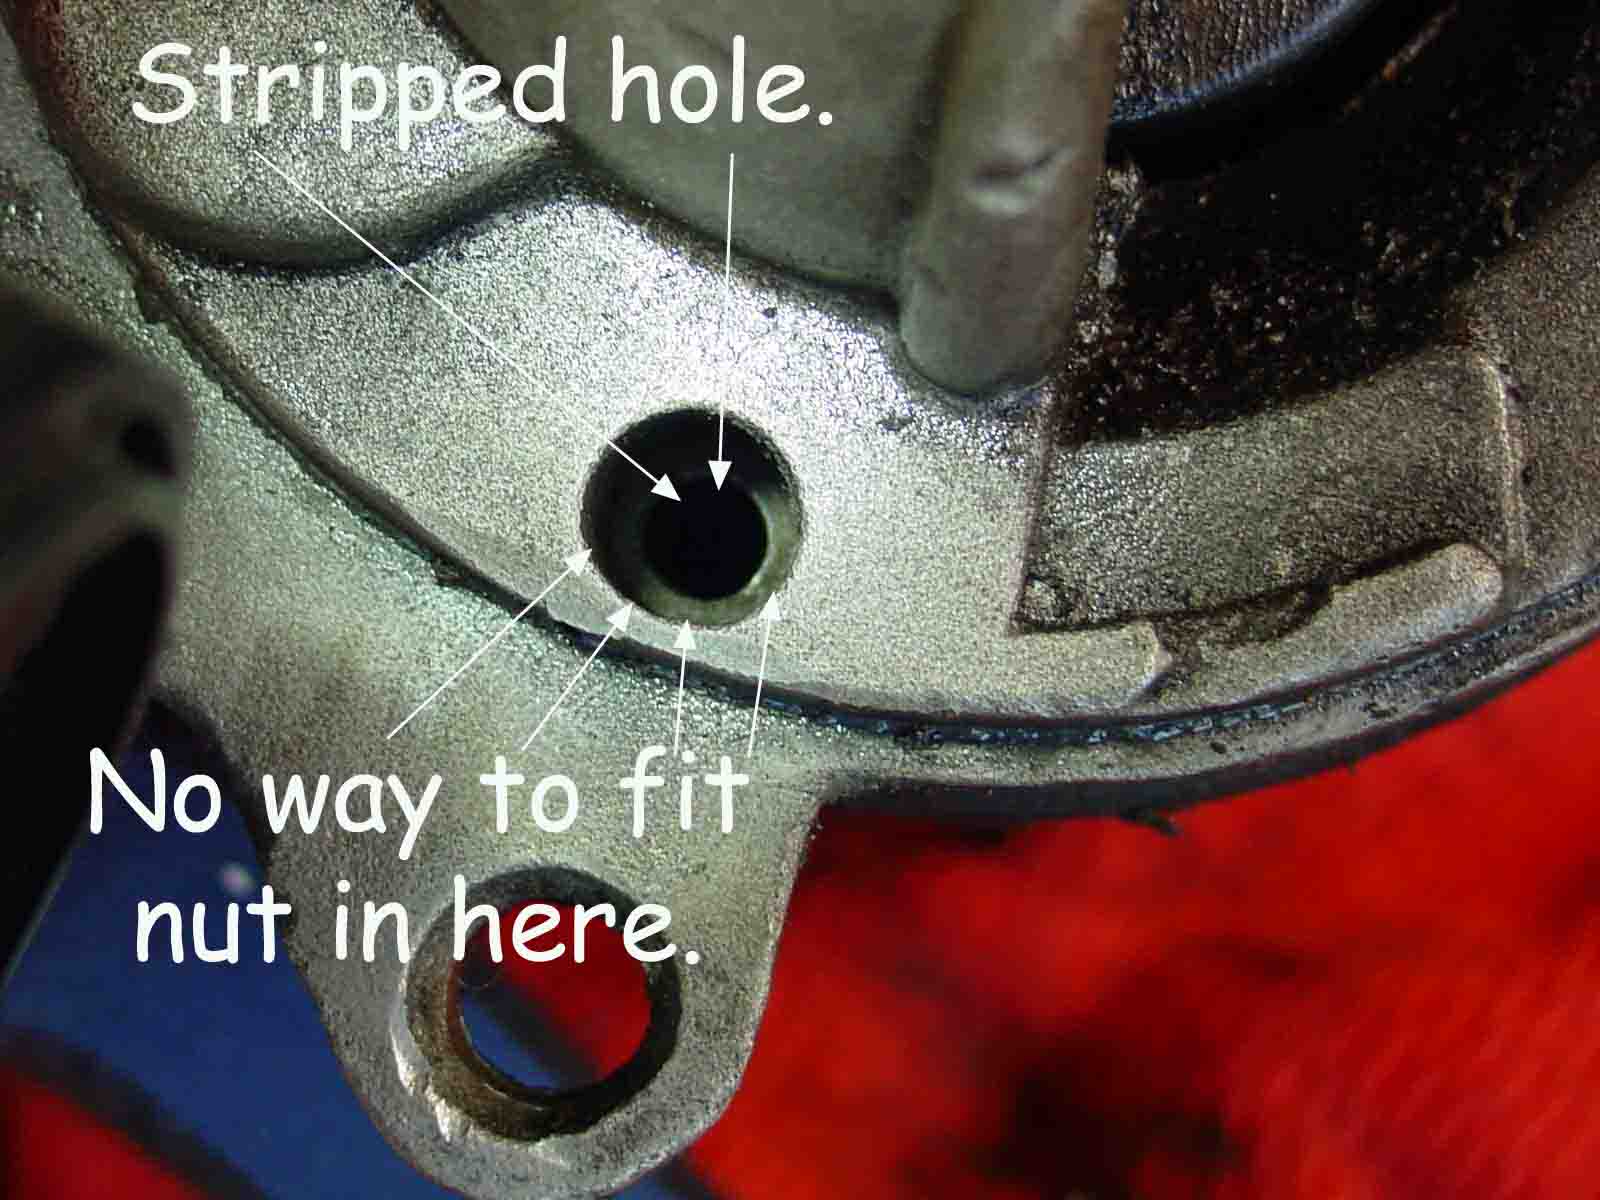
From the get-go I encountered problems with the starter. One of the starter housing holes had stripped out. This made 1 of the 2 lag bolts (that hold the entire starter assembly together) useless. Having only 1 bolt holding the entire starter together, this left a large gap in the starter housing (as seen in the above picture). Despite a good battery, cables, and new solenoid, my starter has been kind of dragging lately. This gap in the starter housing explains why.
Normally my other option is to helicoil the existing hole. However I couldn't helicoil the stripped hole because I would have to insert the helicoil from the top side, while the bolt could only enter from the bottom side. Anyone who's used a helicoil knows that both have to be done from the same side. This made helicoiling out of the question.
Another option would be to take the starter completely apart so I could helicoil the stripped hole from the inside of the housing, but this would take a long time to accomplish. I wanted a quick, durable solution. I had an entire engine to swap out! I certainly didn't want to spend hours on the starter motor.
Since the lag bolts are about 1/2" longer than they need to be, I decided that dropping a nut down into the housing would be the best solution. However the problem here was that the hole was extremely small. No nut with a 1/4", 20-pitch thread would be small enough to fit down into that hole. I toyed with the idea of making the hole larger, but that would send metal bits all through the interior of the starter assembly. Since the starter contains several strong magnets, keeping these bits out of the starter would be nearly impossible.
I also toyed with the idea of grinding the outside diameter of a nut until it fit down into the hole. The problem with that is the work would be extremely tedious and difficult since the nut would have to be held with needle-nose pliers while I ground it on the kevlar wheel.
This page is up as of May 31, 2005 - 12:30 AM.
The stripped starter housing was kind of difficult to fix because my usual options weren't available to me. Normally I would either retap the hole with a larger bolt, or helicoil the hole. Since the bolt that goes through the entire starter assembly is a highly specialized piece of hardware, finding one exactly like it, only with a larger diameter, would be near impossible. In addition there was no guarantee that a larger diameter bolt would even fit through the starter assembly. This long, proprietary bolt (read: not available at your local fastener shop), made retapping the hole to a larger size out of the question.
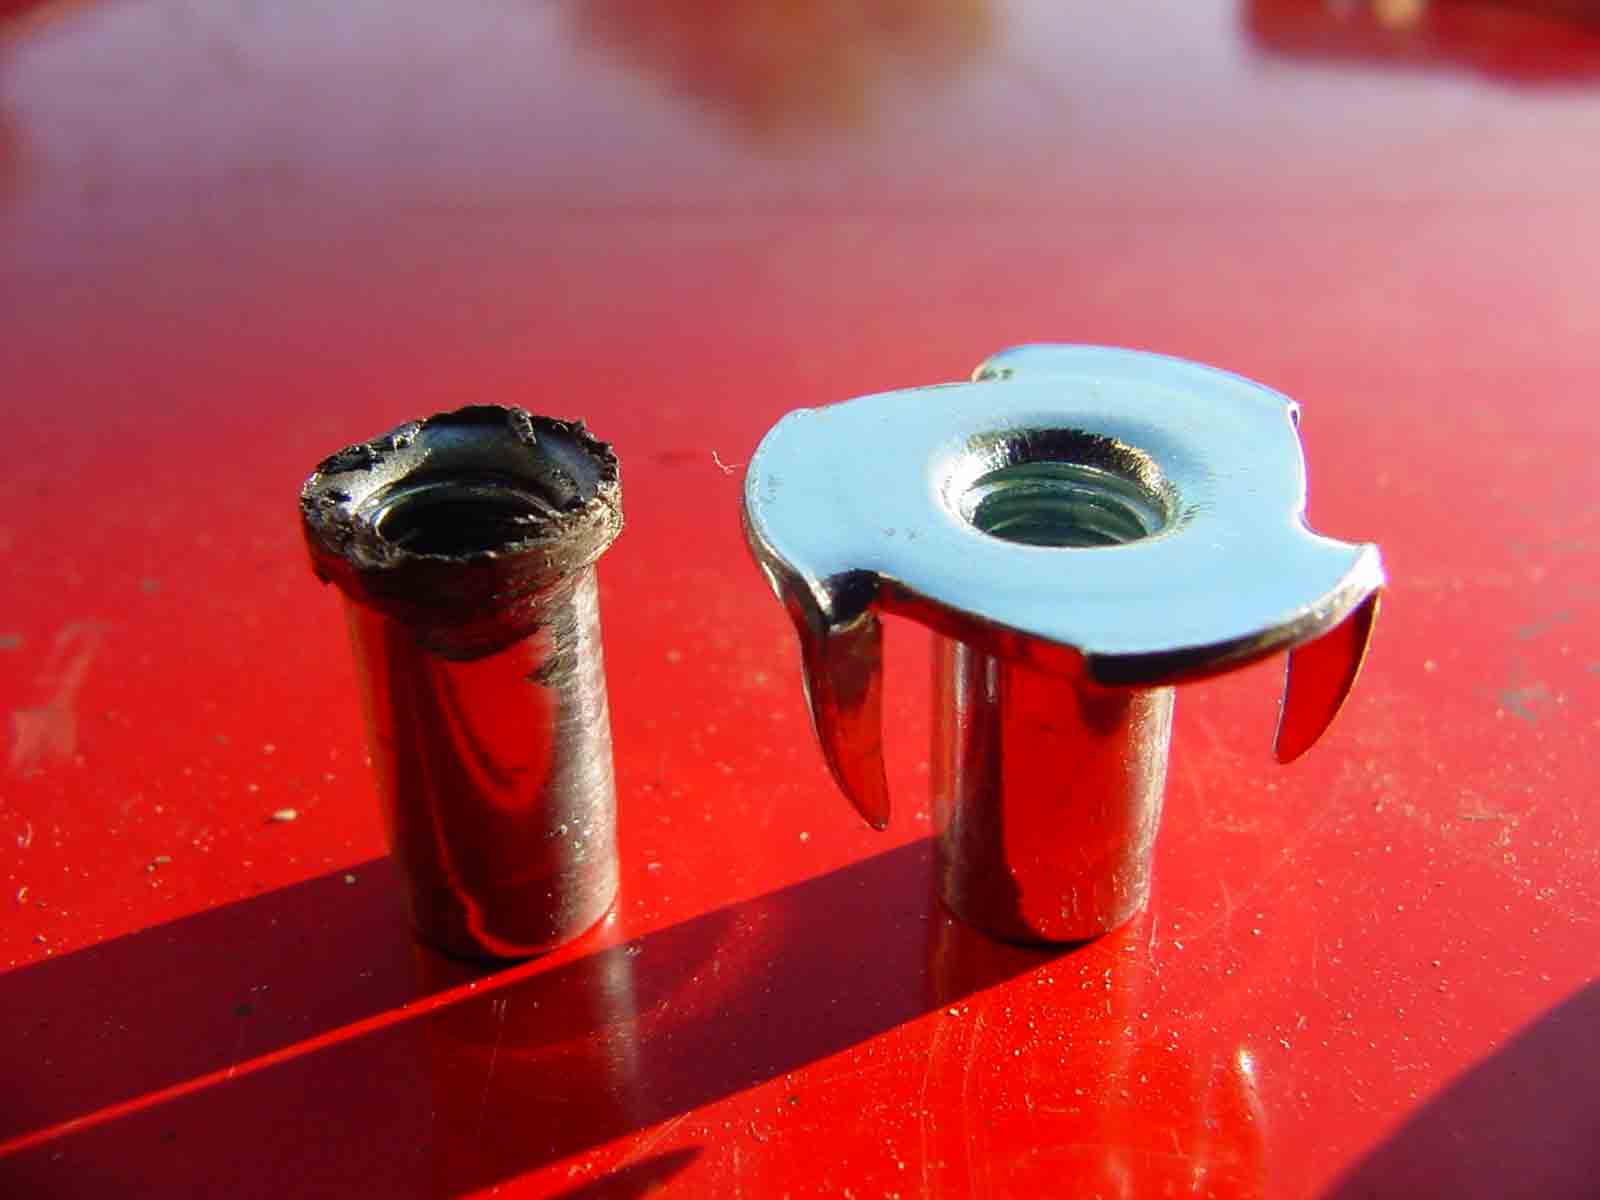
What I decided to do was ground down a T-nut. This was not only easy to do, but it would afford a large surface area for the bolt to grab, thus facilitating reasonable torqueing of the bolt.
Here's the top of the T-nut in the starter.
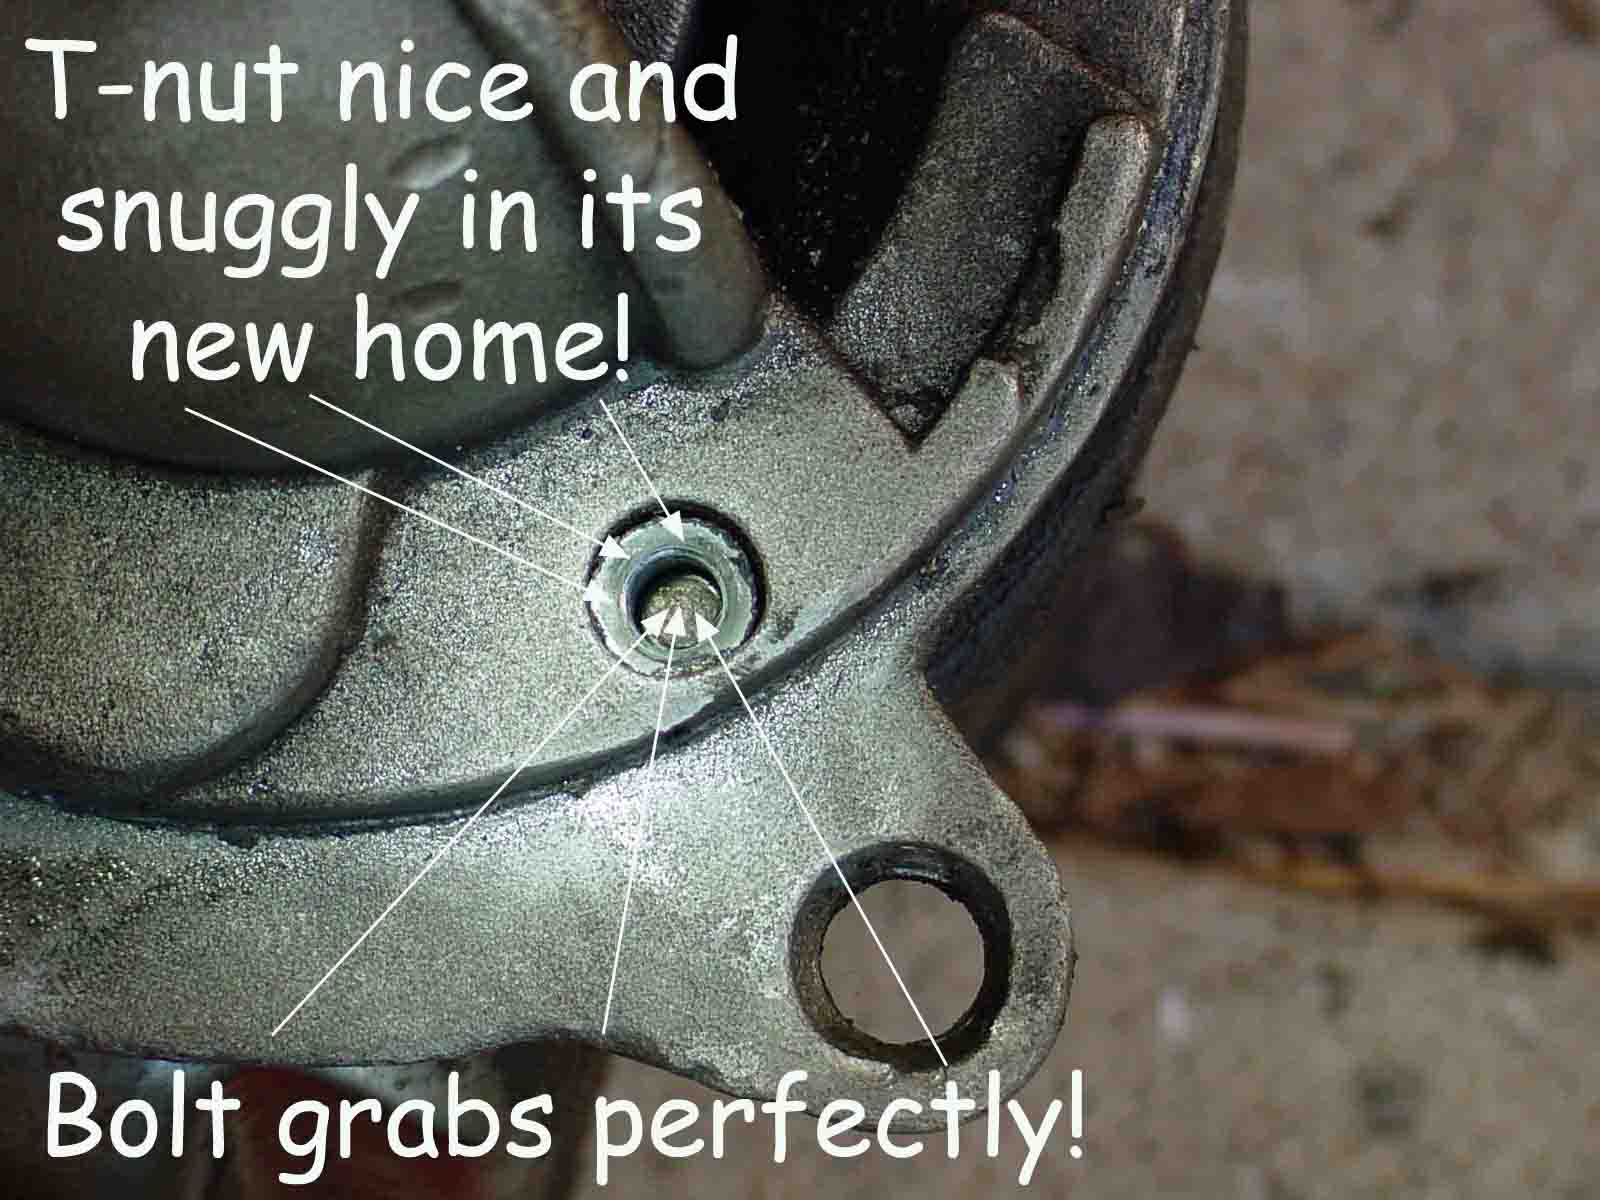
The gap has been closed.
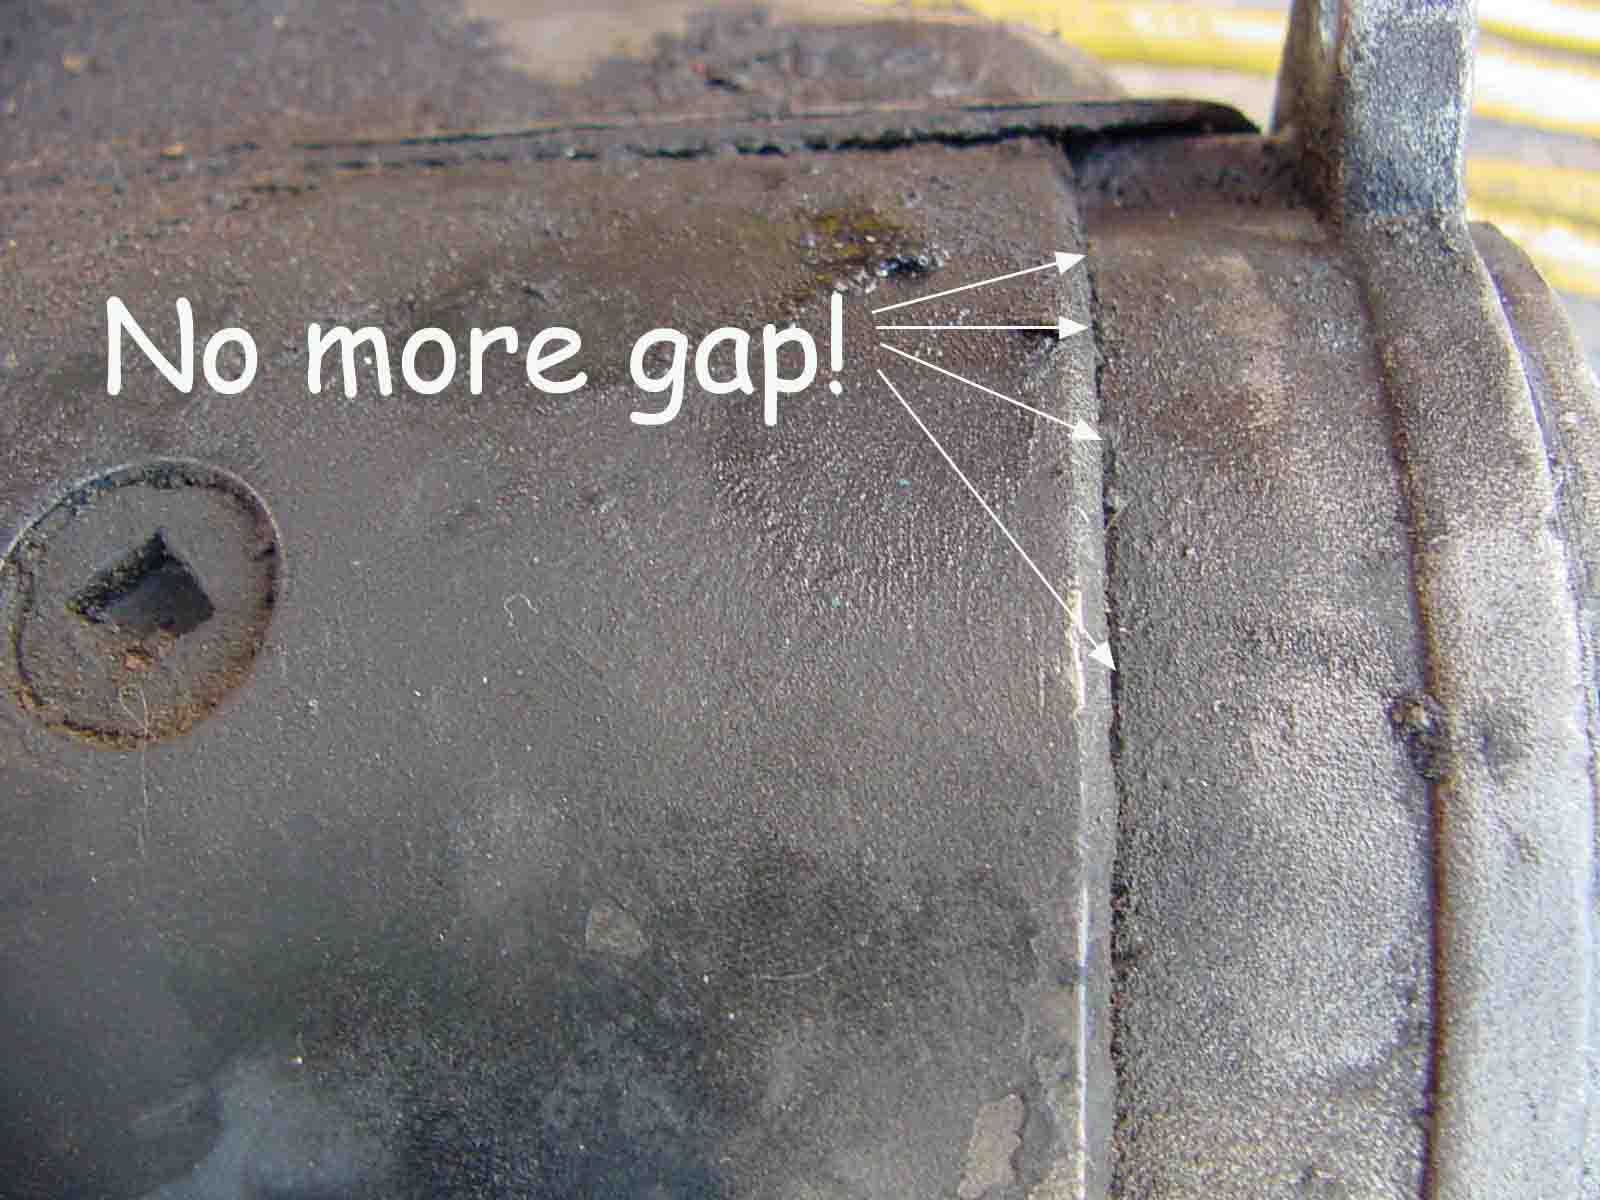
After installing the engine in the truck, it seems that my starter repair worked like a charm. The starter turns like it did the day I purchased it.

e'mail me.


All pictures & material Copyright © 2005 Donnie Frank