Breathing new life into my '76 F-150...
I purchased my beloved truck in the Summer of 1985 from my ex-girlfriend's mother, Mrs. Harp (don't know her first name since I never addressed her by any other name other than "Mrs. Harp"). The truck had been originally used for trailering horses to show competitions (an "American Arabian Horse Association" sticker still resides on the passenger door), but had since been retired since Jamie and her mother no longer paticipated in these competitions. Consequently the truck sat for a very long time on Mrs. Harp's property. The truck was wasting away under the harsh, New Mexico Sun. Every time Jamie and I would visit her mother, I would tease, "So Mrs. Harp, when are you going to sell me that truck?" Finally, after about a year of hounding her, she gave in and sold me the truck for $1500 (split into 3 payments of $400 and a fourth payment of $300). I have been using this truck to haul music equipment ever since. Though her appearance is rough (the truck, not Mrs. Harp), mechanically this truck is in as good a condition as any vehicle on the road today. I would take her to New York tomorrow if need be. So why am I replacing the motor? Good question.
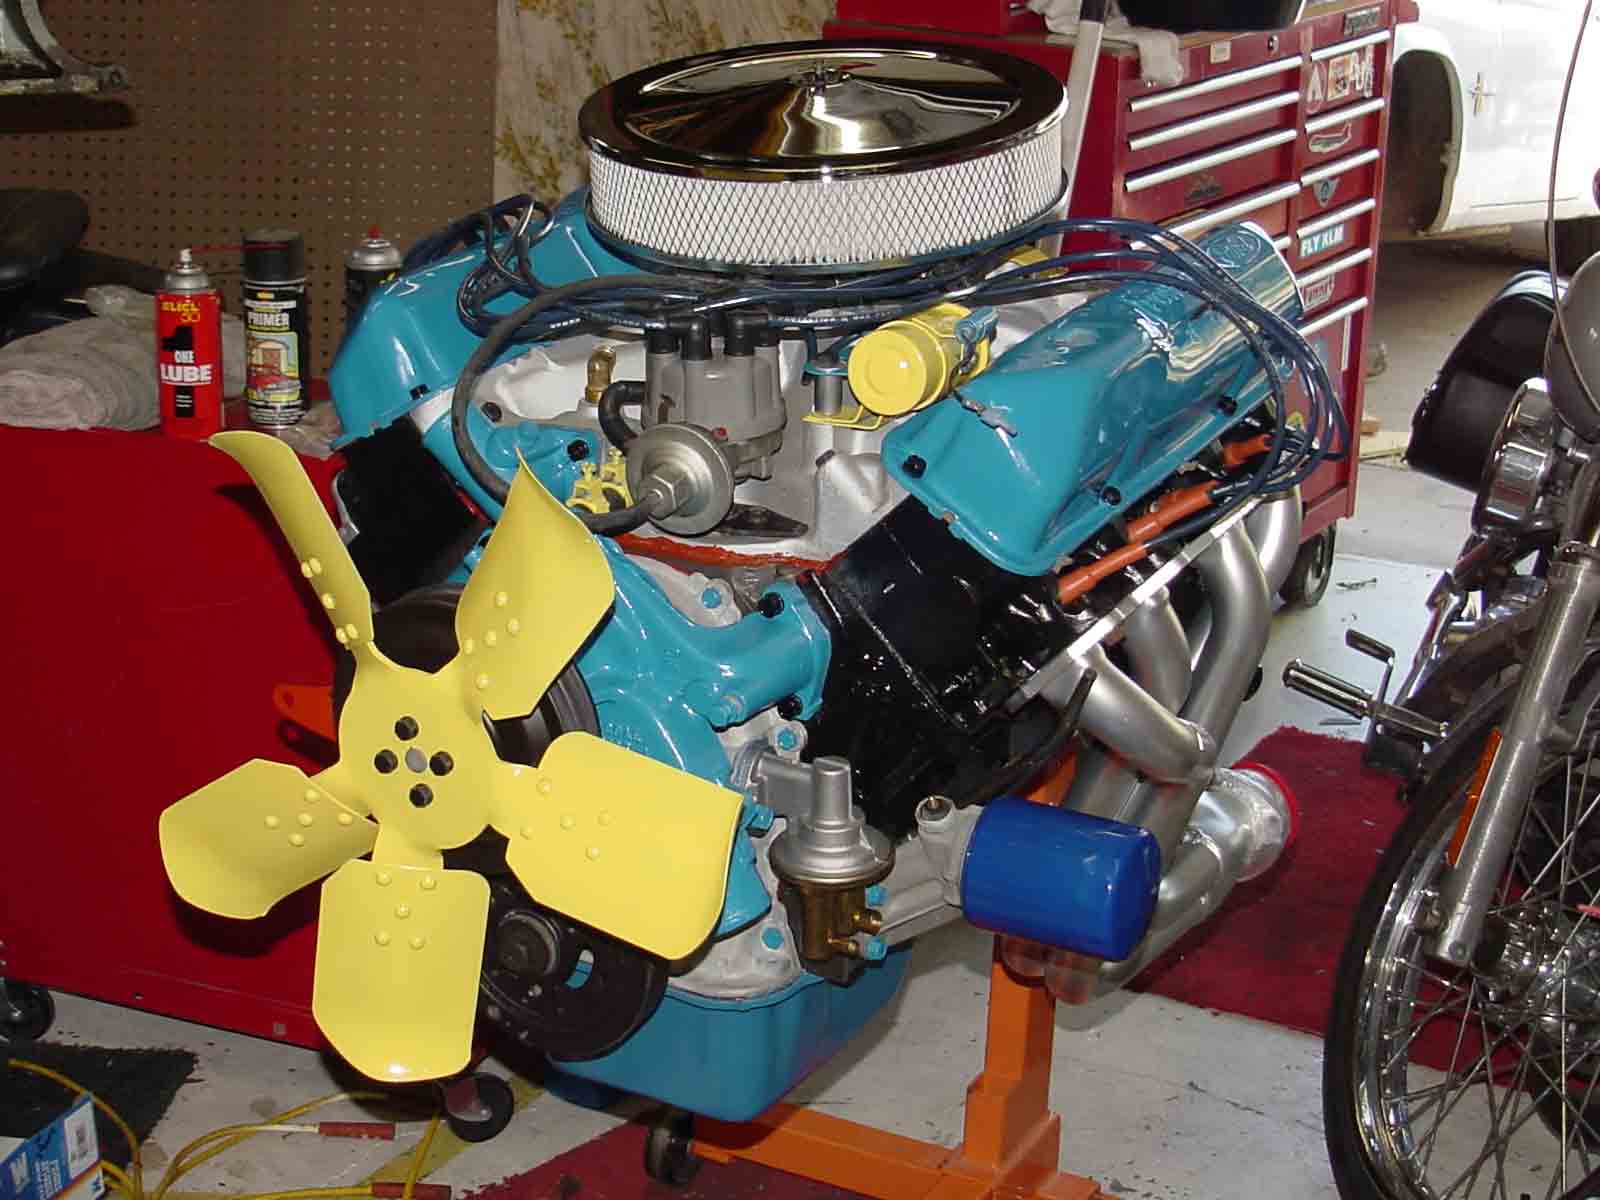
I had the heads rebuilt (with new, hardened valve guides for unleaded gasoline) and she was good for another 8 years. Unfortunately she has recently failed emissions again with 160,000 miles on the odometer. I could do the heads again, but with 100,000 miles on the bottom end, I figured I'd just replace the motor. I would normally rebuild the motor myself, however since I wanted to upgrade to a 390 CID from a 360 CID (would have to replace the crank shaft), doing the work myself became cost-prohibative. Conversely, purchasing an entirely new long-block would allow me to sell my old block outright (which still ran). This would further reduce the overall cost of my engine upgrade. There were other upgrades I wanted to do to the engine. So replacing it instead of rebuilding it just made sense. Here are some of the other Horse-Power modifications I made to the new engine:
1. Upgrade to 390 CID from 360 CID ("There's no replacement for displacement").
2. Since I was trading out the engine and peripherals anyway, I decided to upgrade the 80 lb., 2-barrel, intake manifold for an Edelbrock, 25 lb., aluminum, 4-barrel intake manifold (found on eBay for $186.85, which included shipping). This not only lightened the engine by 55 lbs., but also allowed the installation of a 4-barrel carburetor, which, in-turn, facilitated greater fuel delivery.
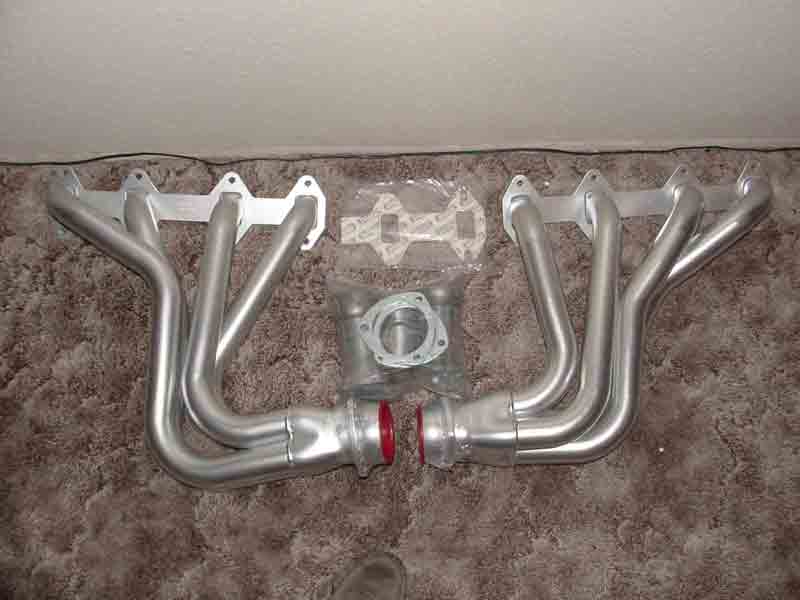
4. Wait! It doesn't end there. As long as I'm going for all this horse-power and greater efficiency, I sprung for a set of Hedman "Elite" headers from JEG'S ($310.00 delivered...ouch!).
My thinking is that, with the lighter engine (by about 55 lbs.), better intake and exhaust flow, and a more tuneable carburetor, I'll be able to break the 14 mpg mark. Traditional thinking states that greater displacement and more carburetion automatically add up to worse gas mileage. However it is my belief that building a more efficient power plant will not only increase gas mileage, but will make more H.P. available to me when I want it. We shall see. I will post results to this site.
Removing the old parts from the old engine...
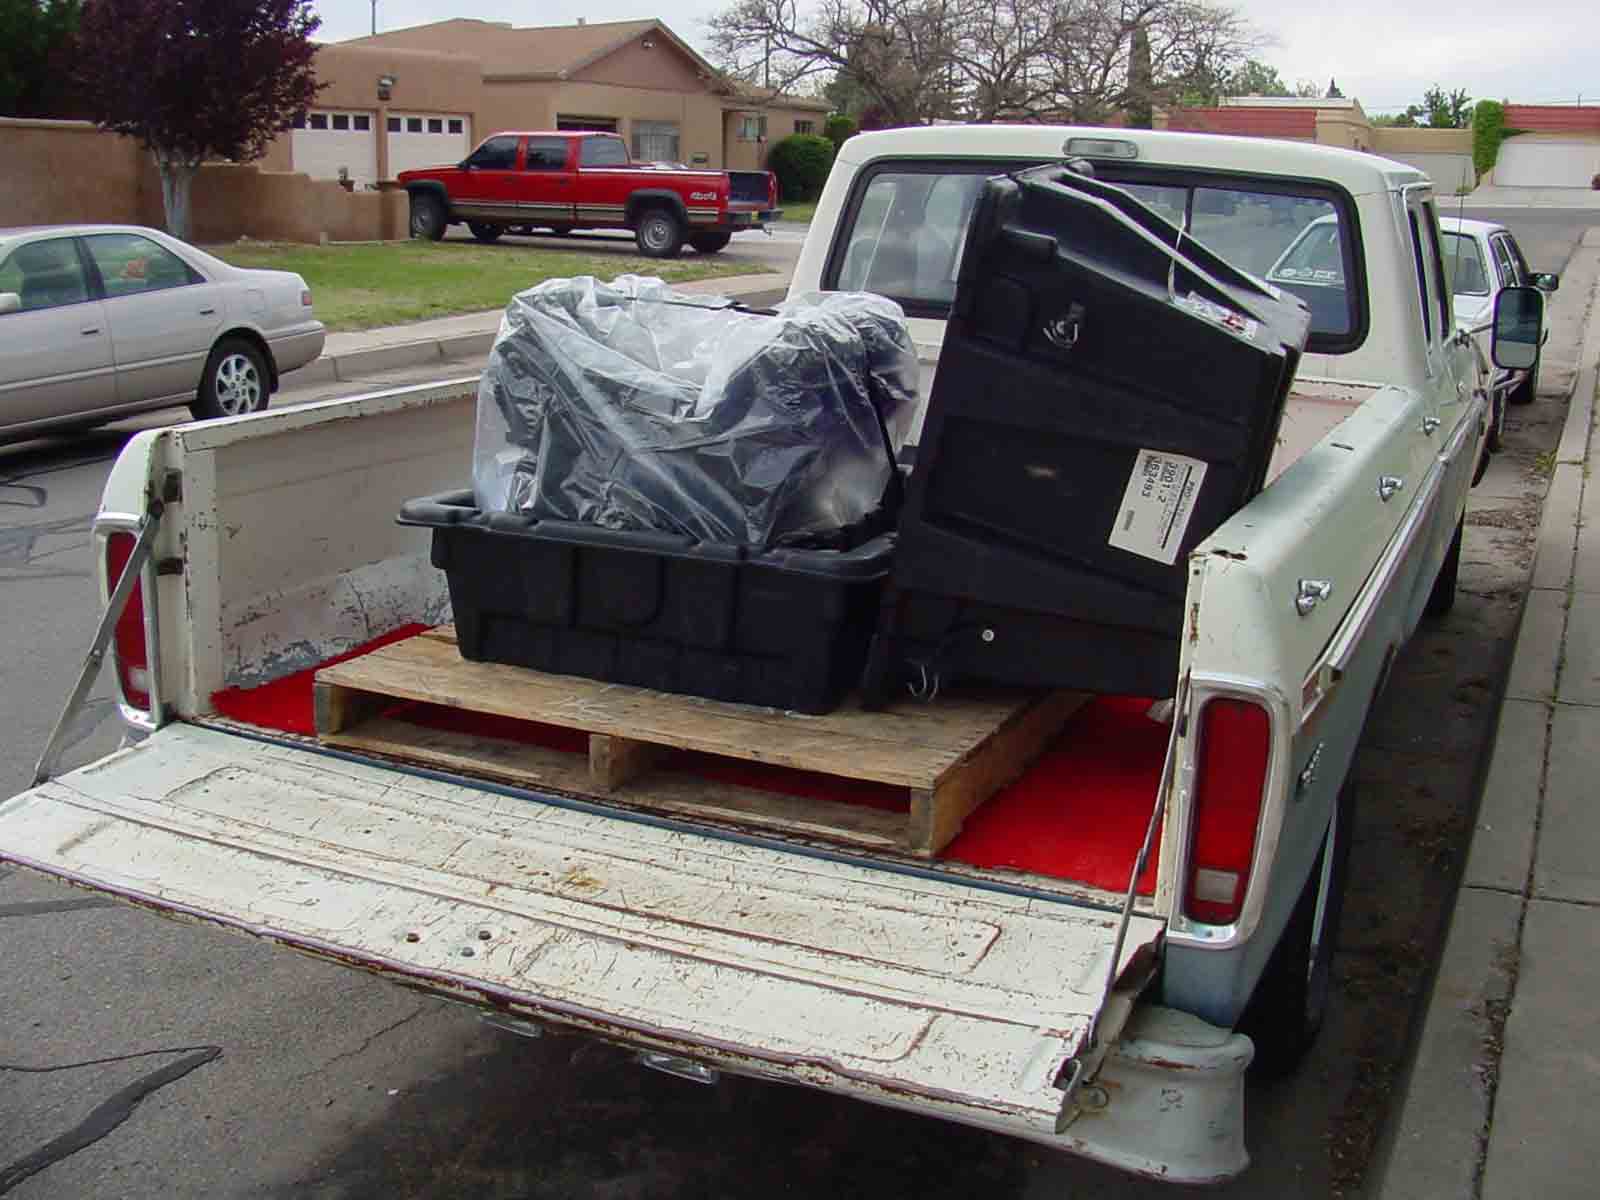
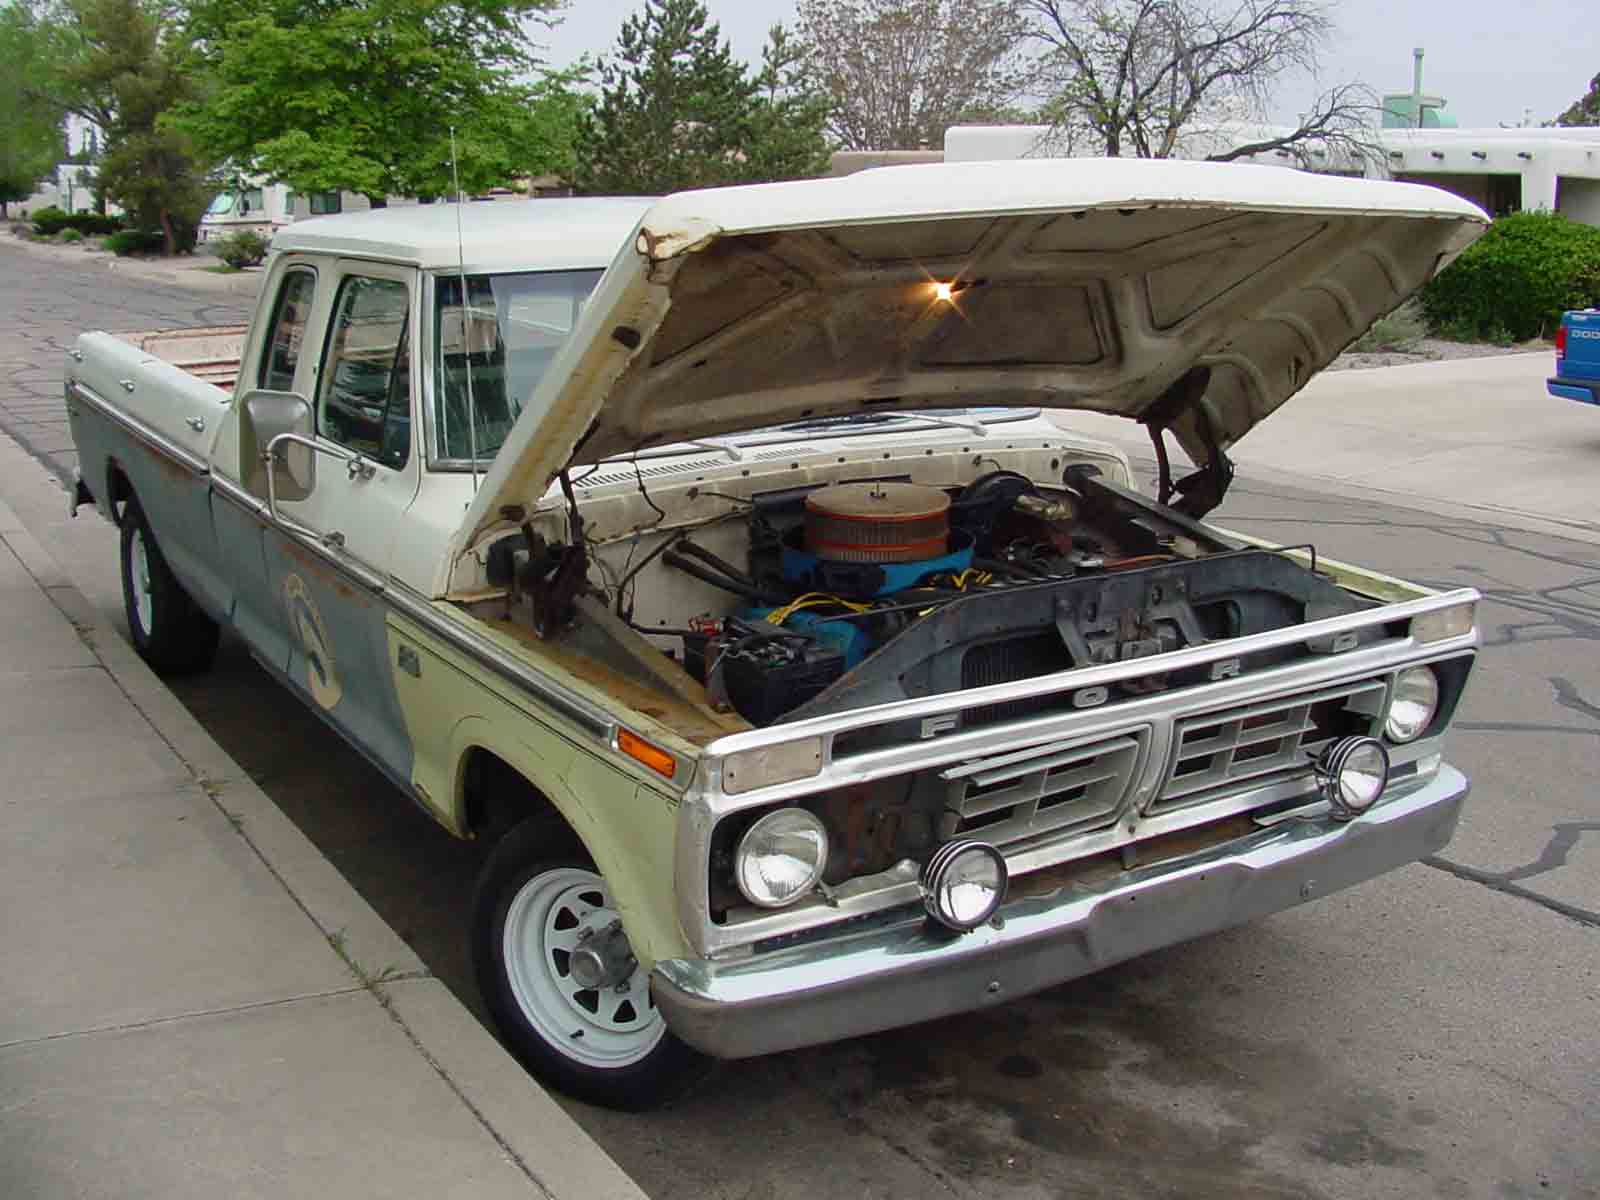
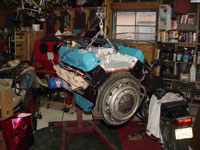
Here's my truck just prior to "surgery."
Building the new engine...
1. I'm cheap
In all fairness to professional mechanics around the world, they are correct. After solvent washing, bead blasting, high-pressure-spraying, wire brushing, polishing, and dishwashing my parts (or any combination of the 6), there's no way a shop could make a profit without charging 3-4 times what I spent on this project.
Here's how I get my parts ready for sand blasting. I do this process again post-blasting to remove all media (abrasion compounds).
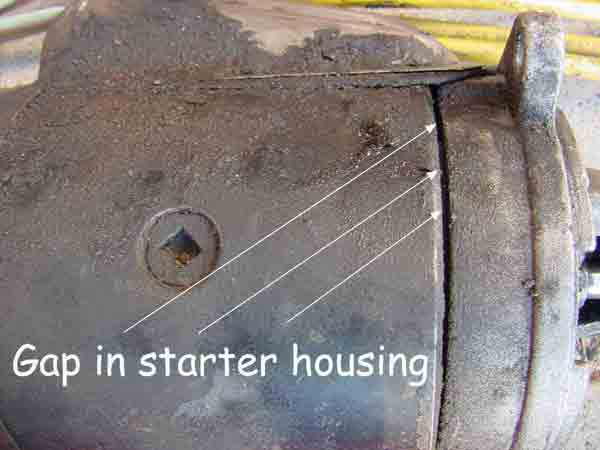
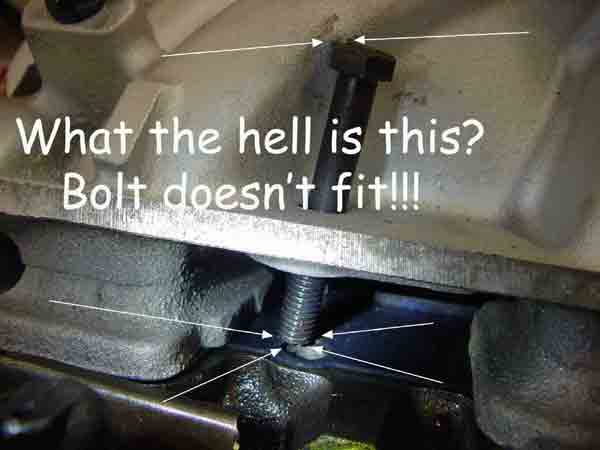
Right away I had to overcome problems...
Semi-success...
Below is a picture of the new engine installed in my old truck. Initial installation went fairly smoothly, however once the engine was started and running (usually the hard part), I found that most everything was leaking. The good news was that the engine started with only 30 seconds of key turning and throttle pumping. I took her through the initial 20 minute break-in without blowing the engine up...good deal.
The bad news was that the damn thing leaked everything. Within the first 5 seconds of idle I noticed a vacuum leak (made blatantly apparent by a horrible whistling noise eminating from the new carburetor base gasket). Not so quickly noticed was the horrible leak that belched oil from both valve covers. You can thank Permatex 77B for that. Don't use it. It's junk. A few minutes later I noticed a water leak eminating from the thermostat housing, again "sealed" with Permatex 77B "Gasket Maker." Since everything was leaking, I decided to inspect the fuel lines. The line going into the fuel pump was leaking...[sigh]...
Quickly fixed was the fuel leak. Taking slightly longer (and several attmpts) to fix were the valve cover leaks and 1 of the 2 water leaks. Left to fix is the intake leak. Taking a really long time to fix was my water pump leak. My water pump had developed a leak from the indicator hole, which meant it had to be replaced. The pump was a lifetime warranty item (purchased in 1989), so it was simply a matter of finding the time to R&R ("Remove and Replace") the pump.
Once all that crap was fixed, I took her for a drive around the block. With the exception of the intake leak causing a rough idle, she ran well. The clutch needed adjusting, too.
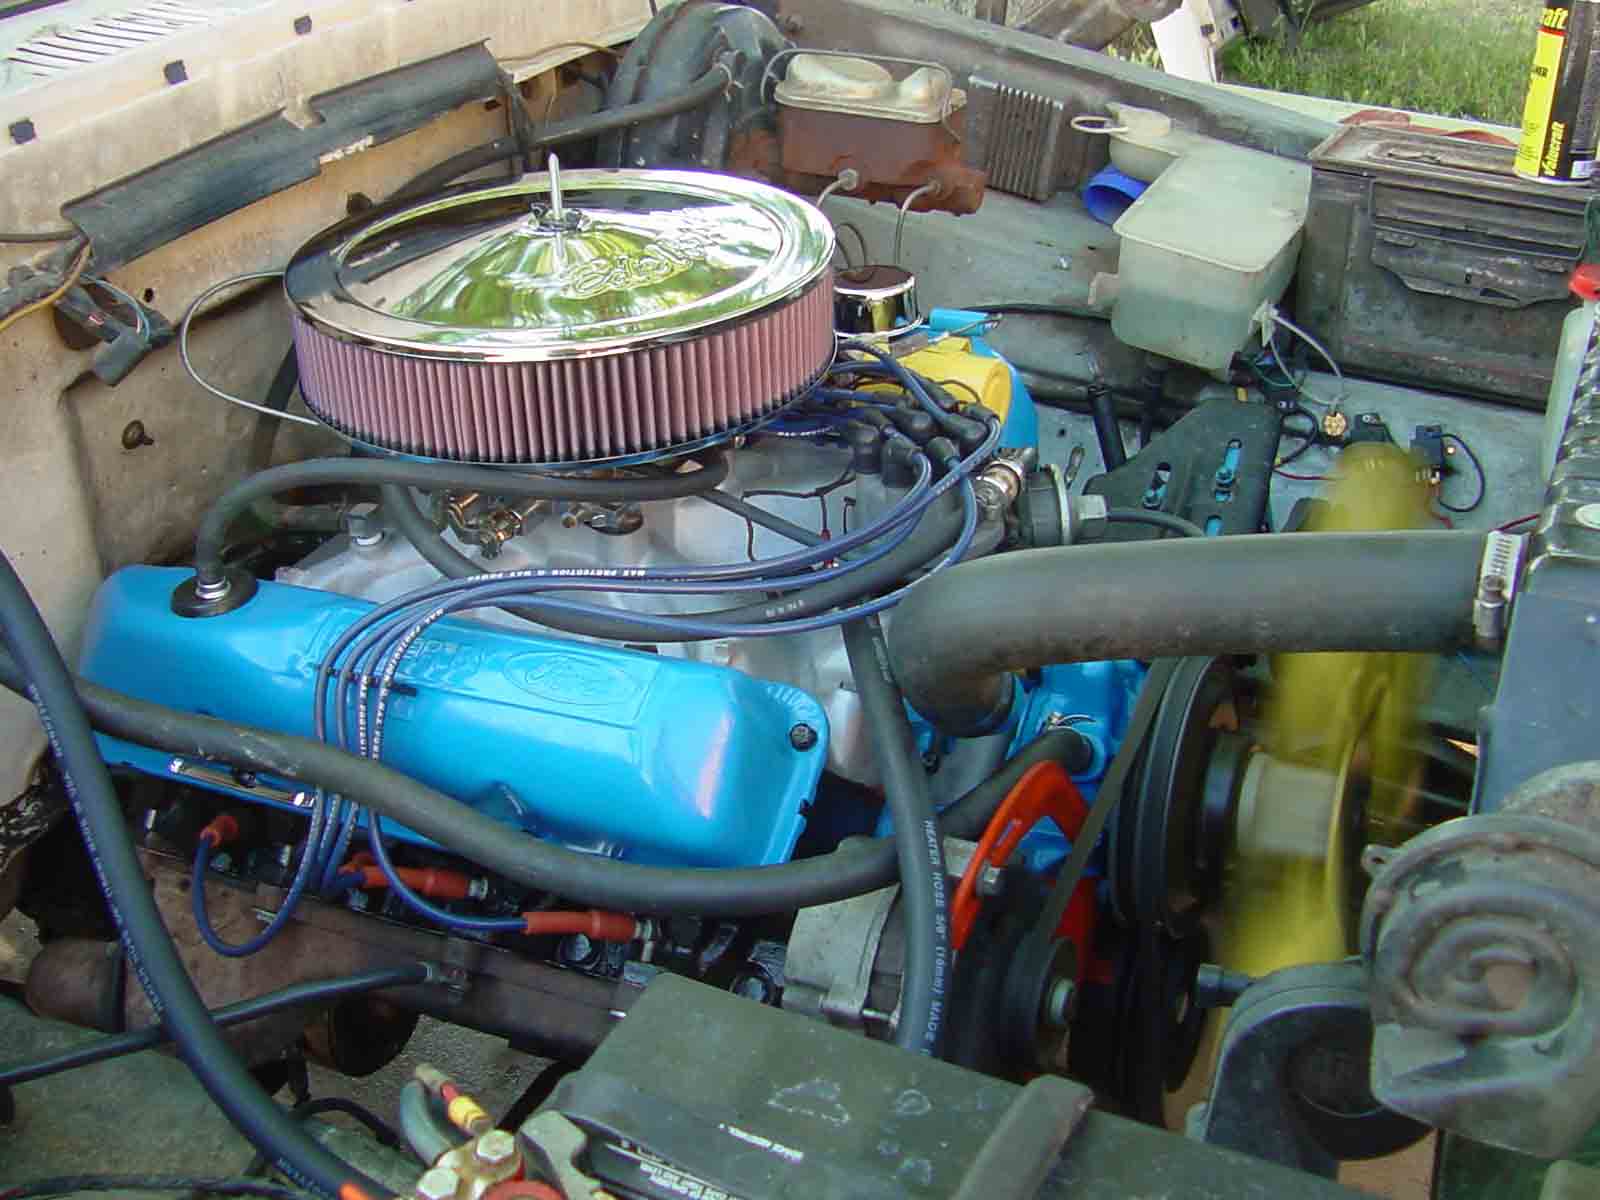
Here's a picture of the new engine running.
Exchanging the water pump at Pep Boys was quite an experience. My receipt was dated back to 1989. I got some raised eyebrows, but they complied with the warranty. They didn't have another "remanufactured" pump in stock, so they gave me a new one. He shoots, he scores!
BTW, the truck is mostly done. I still have an intake leak somewhere (driving me nuts). I was able to get rid of 95% of the leaky valve cover issues. I guess they'll never be completely oil tight. God willing, I'll find time to fix the intake leak during my next break from school (last 3 weeks in August).
This page is up as of May 5, 2005 - 5:17 PM. Updated November 15th, 2005 - 8:35 PM.
If you have any questions, comments or suggestions, please
When I purchased the truck she had about 80,000 miles on the odometer. Mrs. harp had had the engine rebuilt at 60,000 miles. I know this to be true because the engine had been painted entirely in iridescent green...yuk. Around 1990 the county of Bernalillo implimented emissions control requirements for all vehicles manufactered in 1976 or later. Just my luck, eh? Eventually my truck failed emissions because of bad valve guides. The failed valve guides were a direct result of the EPA's ban on "regular" gasoline, which forced the use of unleaded gasoline. For those not in-the-know, unleaded gasoline ruins old-style "leaded" valve guides. All one can do is run the unleaded gas until the guides fail, at which time they must be replaced.
3. As noted in #2, I now needed to purchase a 4 barrel carb. I found an Edelbrock 1405 on eBay for $130.78 (which included shipping).
I started trading out engine peripherals (valve covers, oil pan, etc.) on May 9th. As of May 15th, the new engine was completely built and ready to be installed.
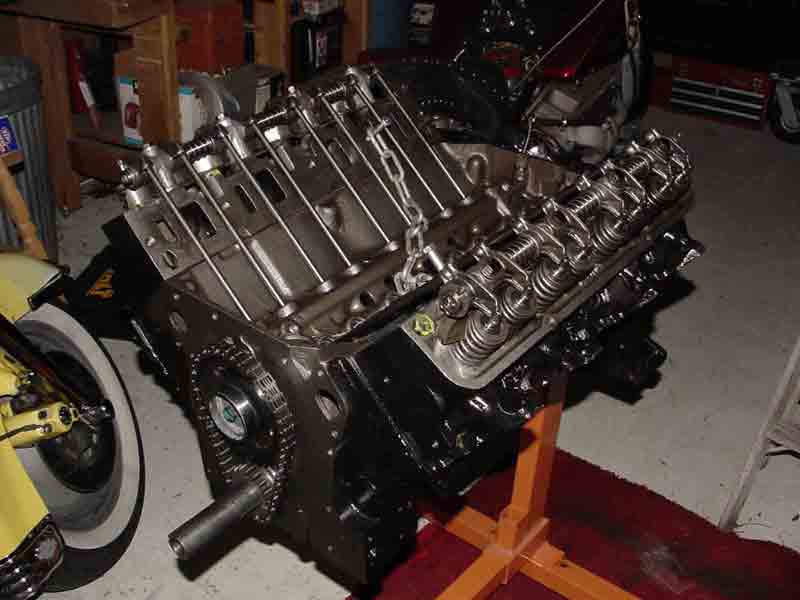
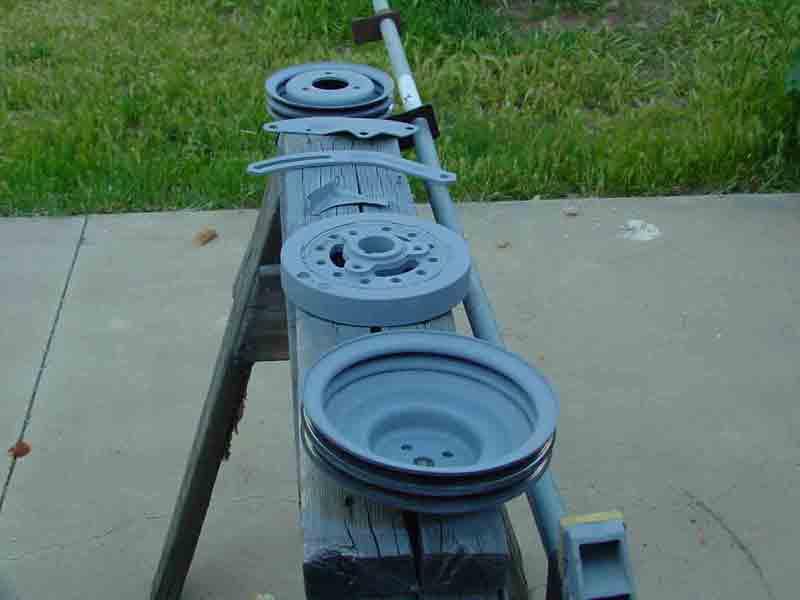
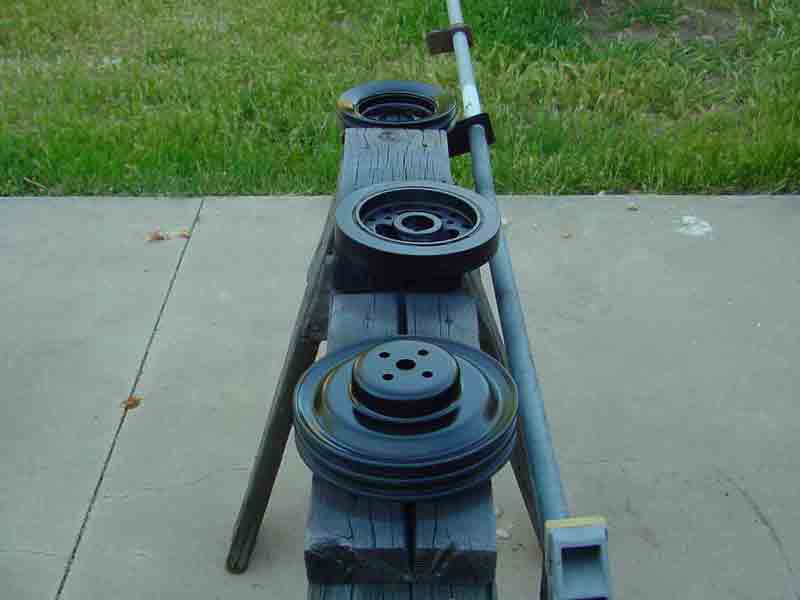
Here's some pictures of the engine and parts prebuild.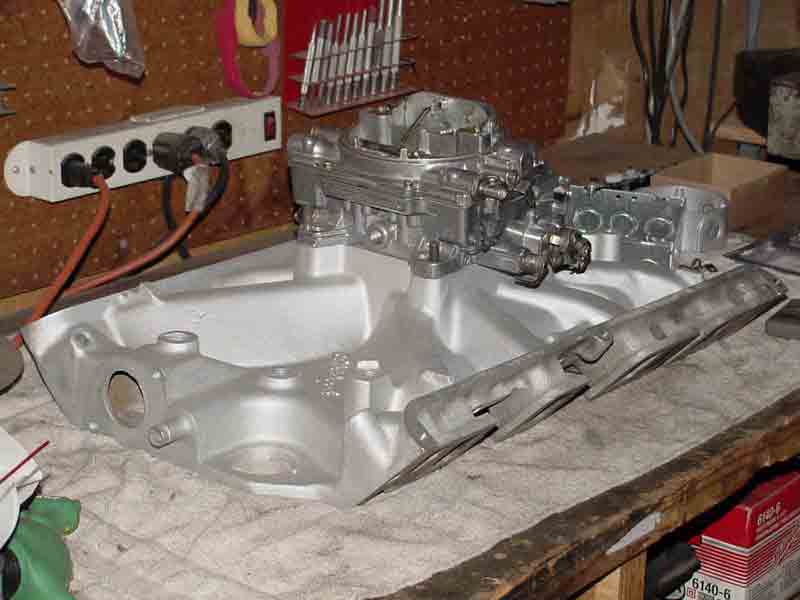
Edelbrock intake manifold and Edelbrock 1405 carburetor.
New engine (Long Block) by Proformance.
New Hedman headers!
And here's the old engine as she sat in my truck the day I started this project (notice my high-performance, high-flow, air filter set-up?).

Here's a picture of the engine compartment with most of the junk removed in preparation for removal.

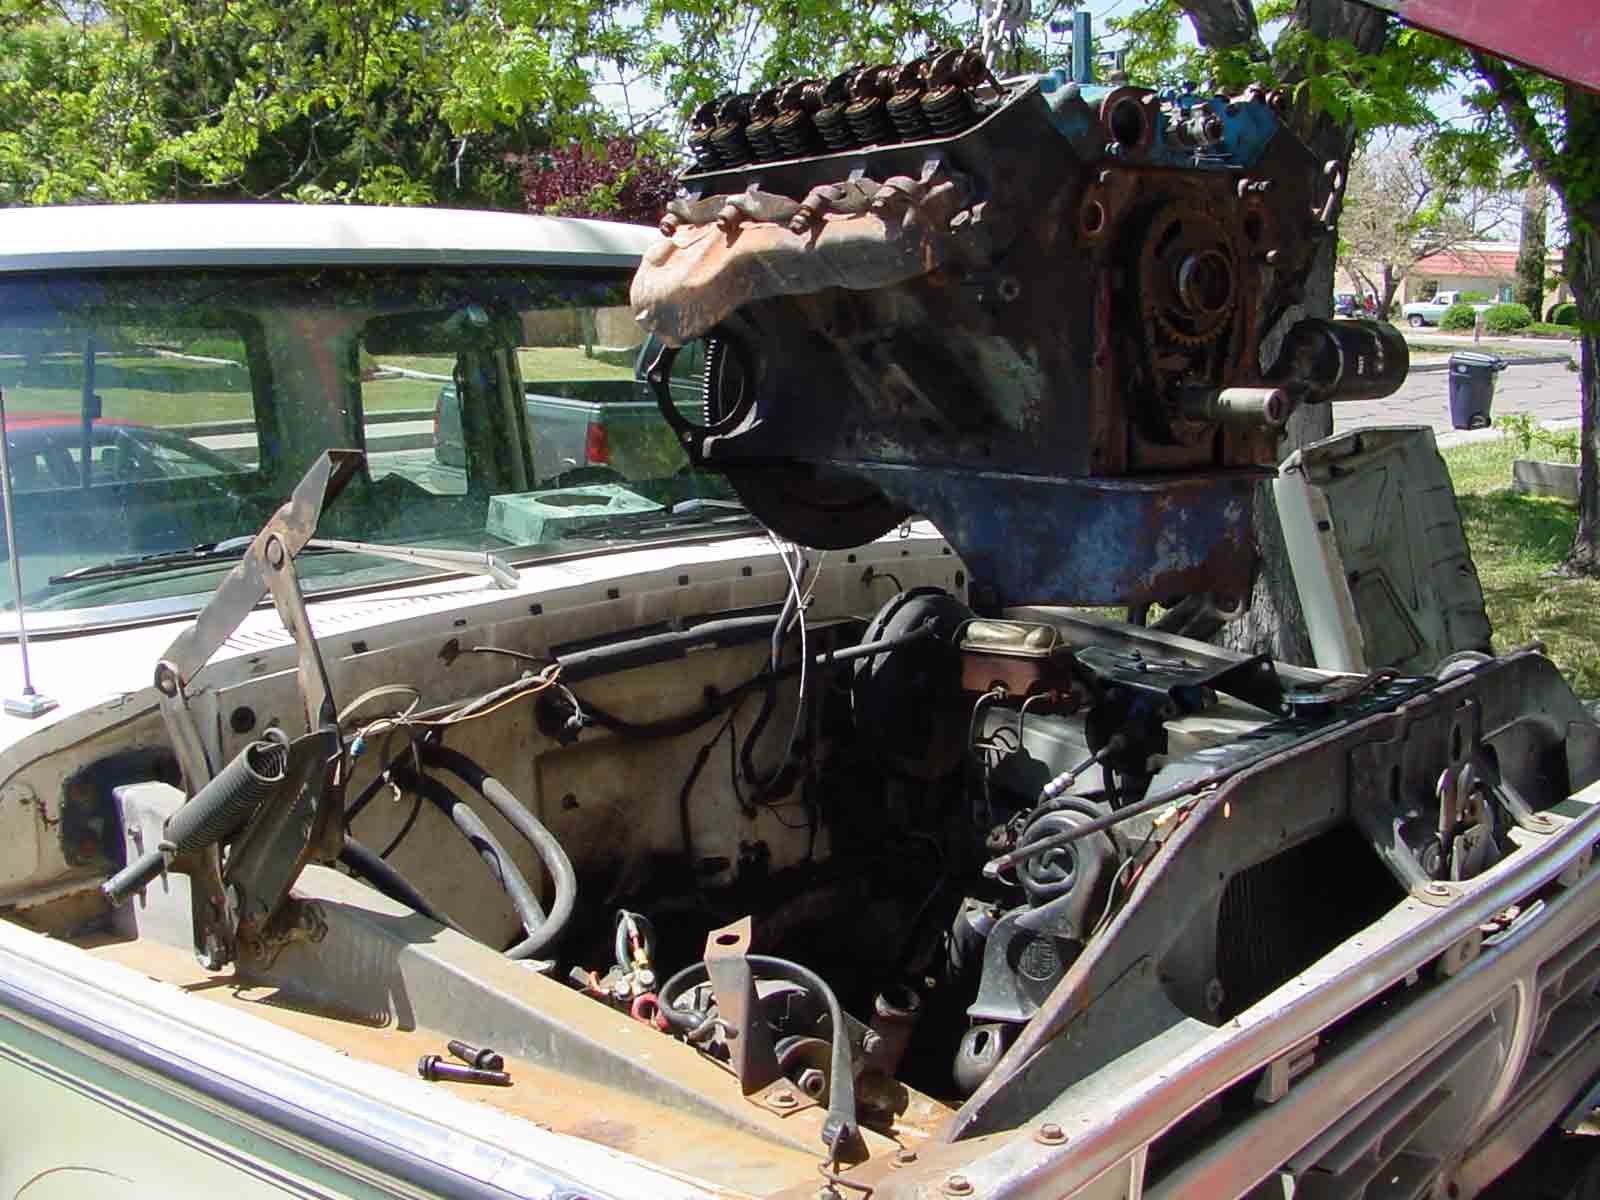
And here's the engine being removed.
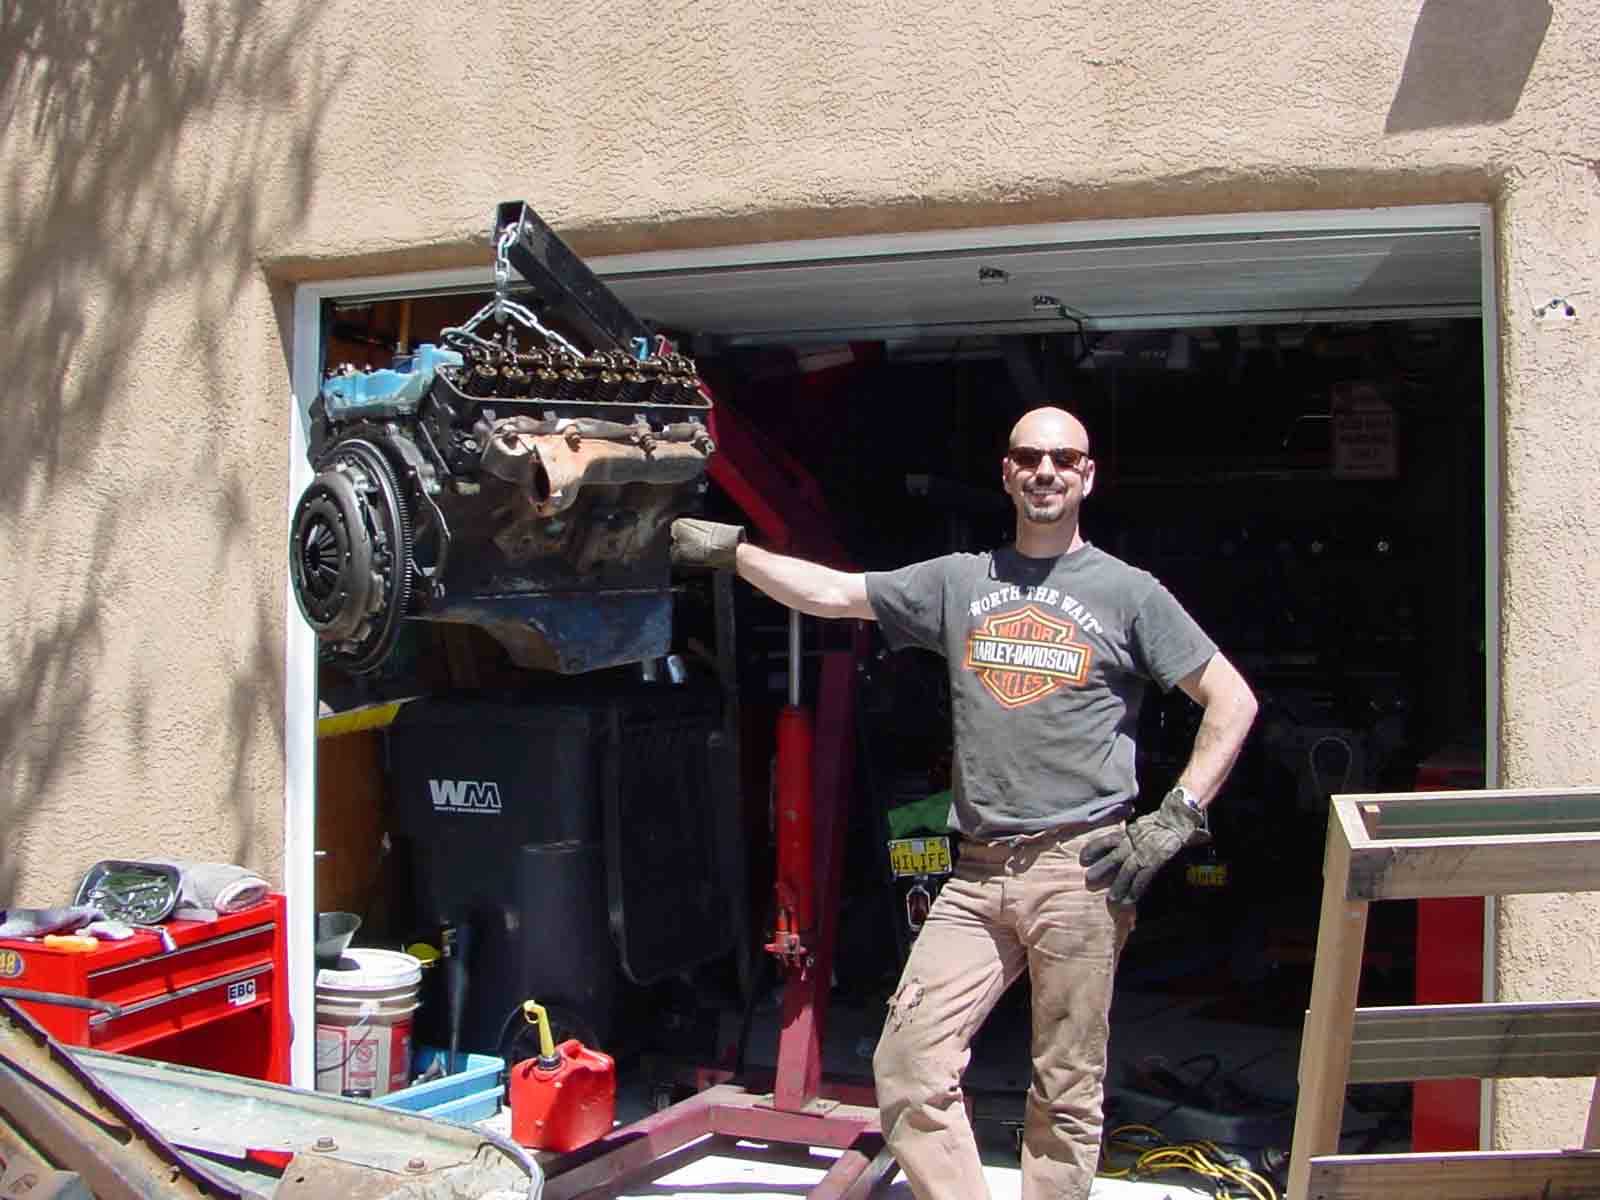
Here's the surgeon (me).
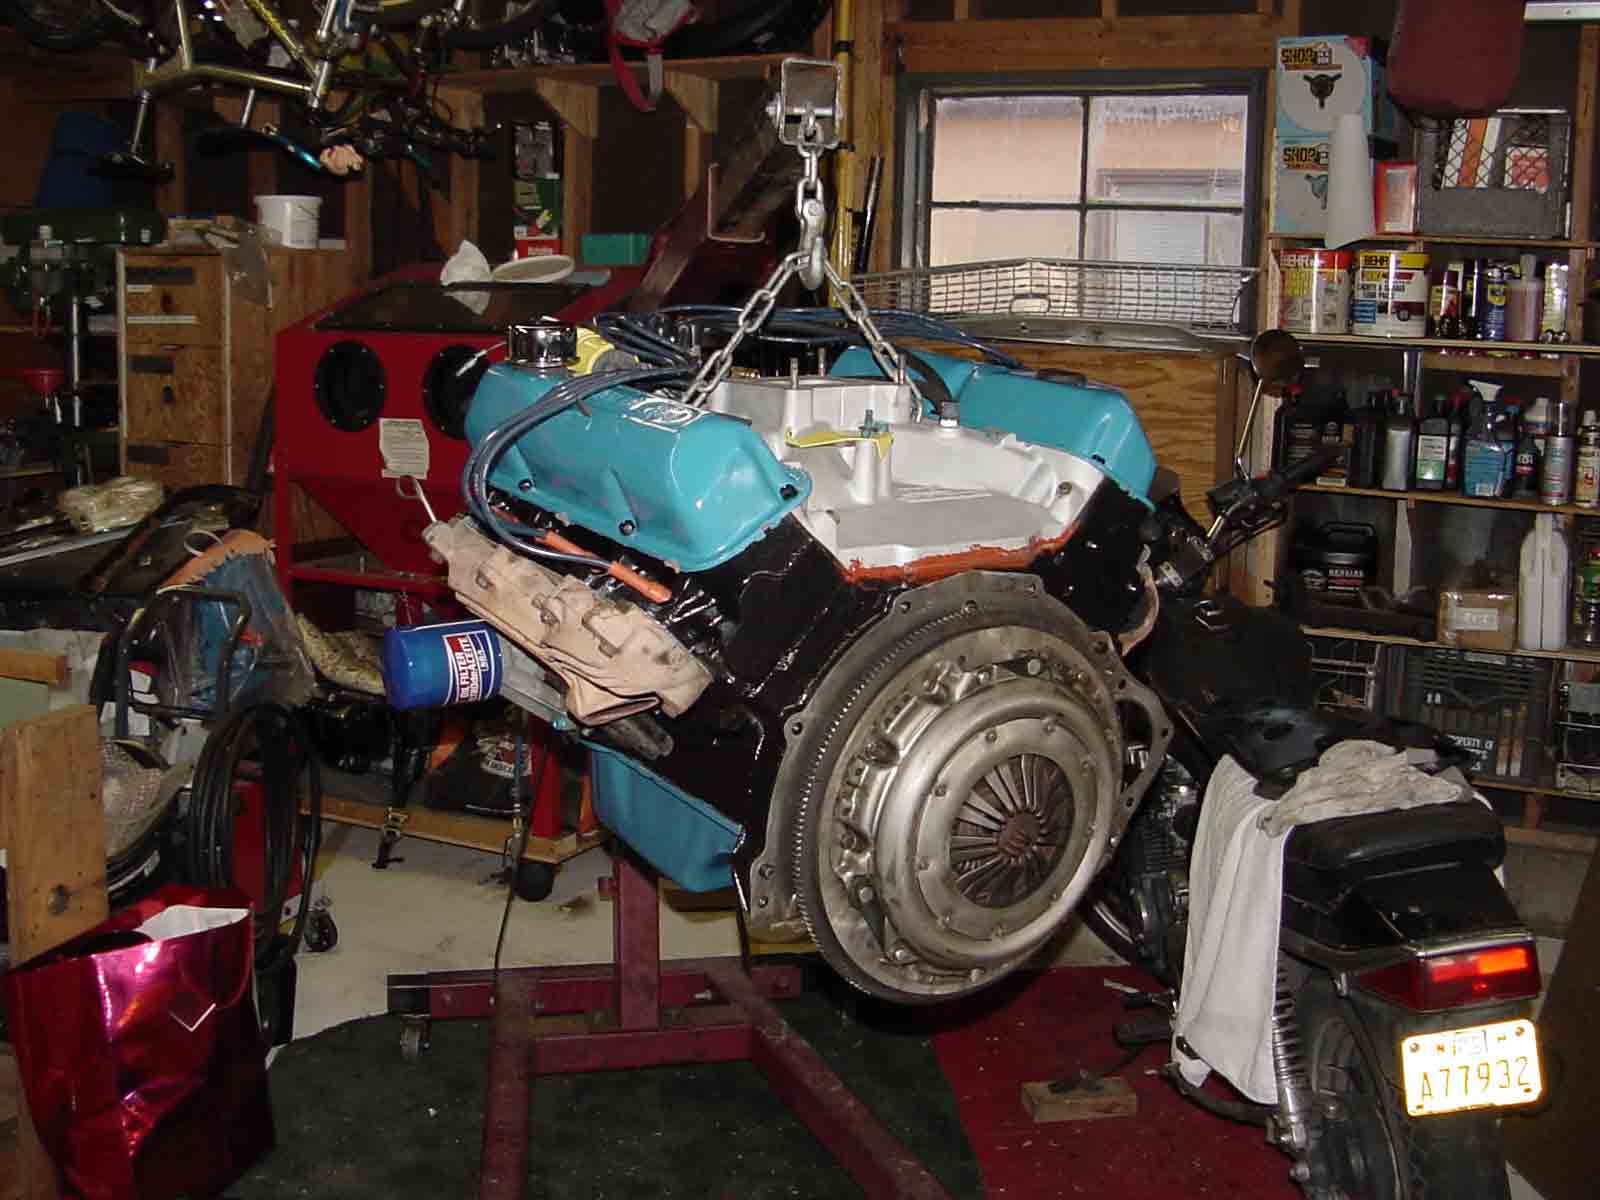
Here's both engines in my garage.

Go down to this picture
A lot of times I'm asked why I do these types of jobs myself instead of paying someone to do it for me. The answer is two-fold:
2. Mechanics do not consider it to be cost-effective to be as meticulous as I am.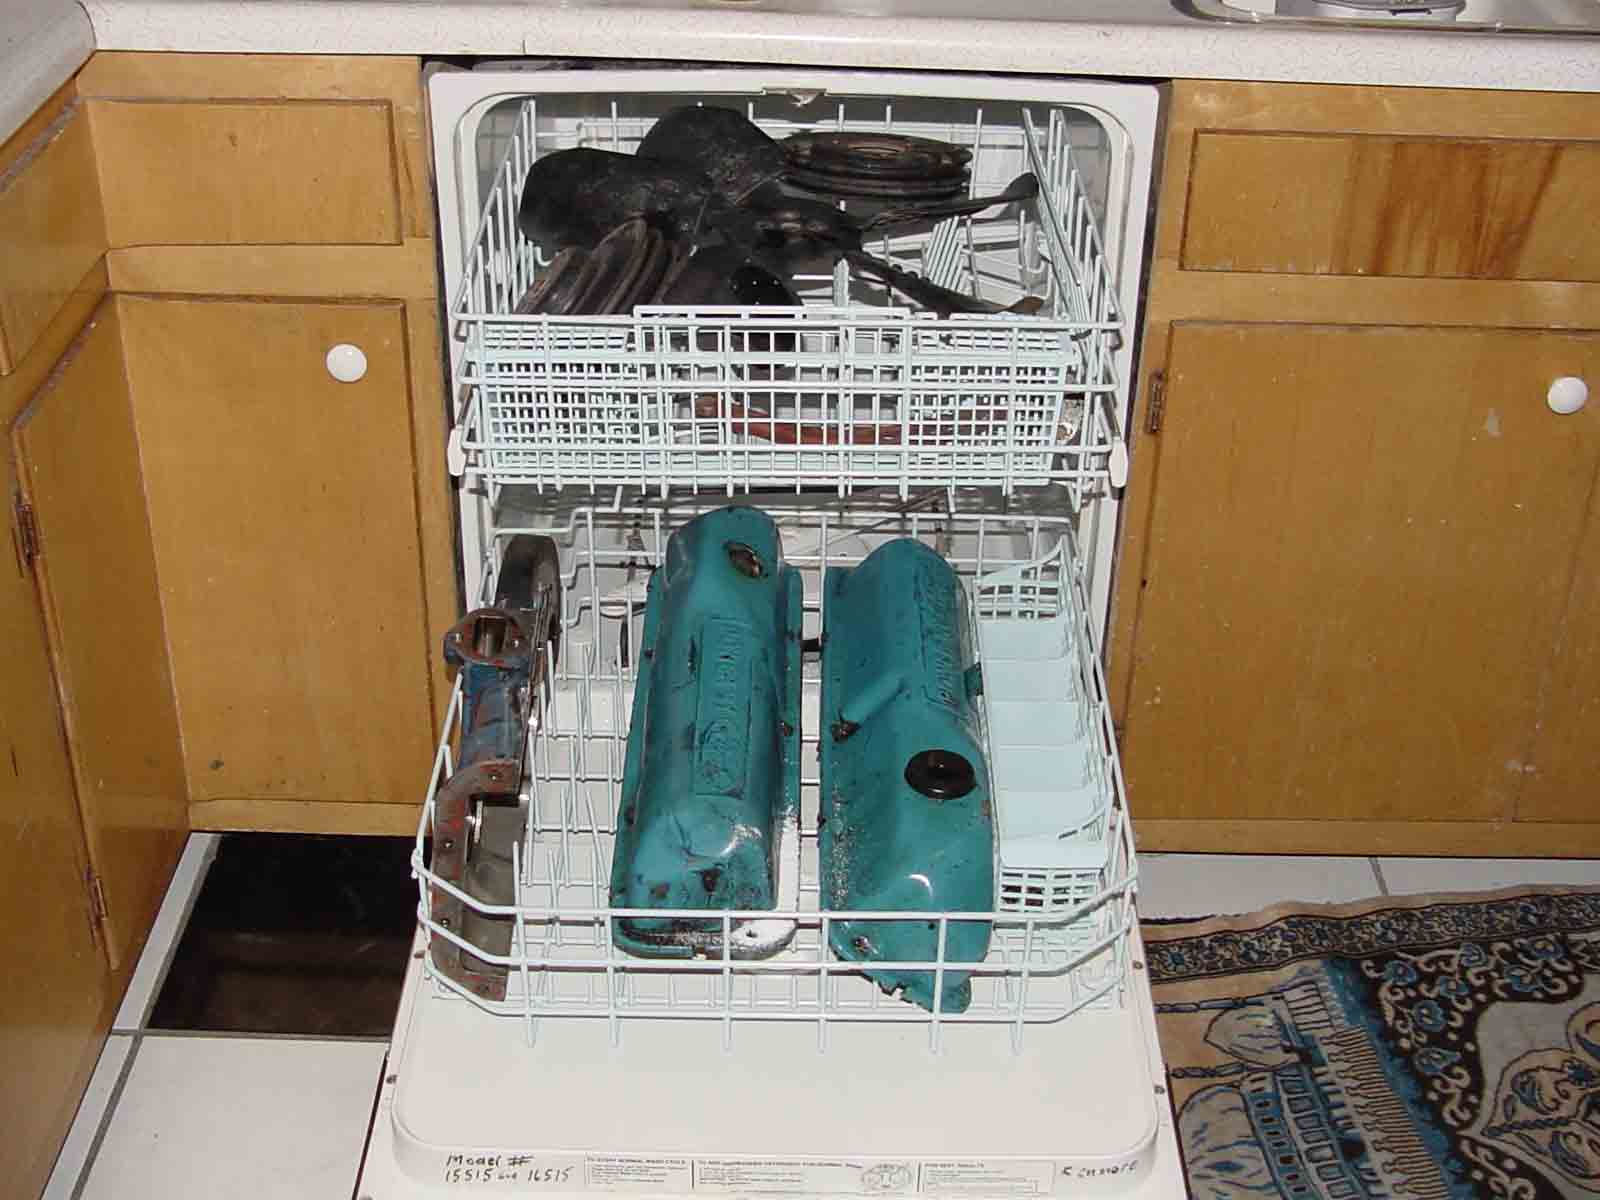
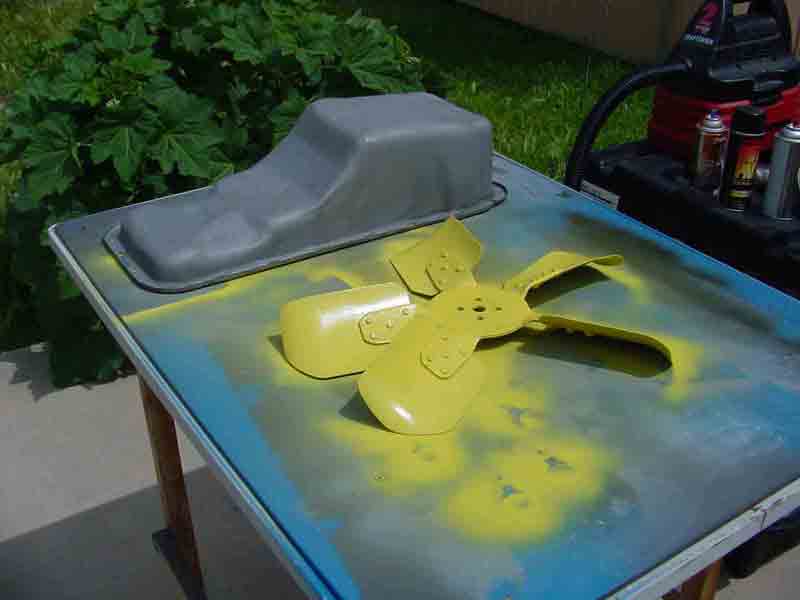
And here's the actual "paint factory."

You just can't pay a mechanic to do be this meticulous. One of the reasons I do all this work myself is I just plain ol' enjoy it. I love taking old crap and making it look and operate as if it were new. This type of detailing makes a project like this take double or triple the time it would normally take to simply swap motors without refurbishing or restoring. Add documentation (all the picture taking), and that adds another day to the project.
Edelbrock intake manifold fiasco
The header warranty forbids installation on a brand-new engine, so at this point I had mounted up the old manifolds to be used during the break-in period. Headers will be added after the initial break-in.
 Getting rid of the intake leak
After replacing the $130.00 eBay carburetor with a FREE version of the same carburetor (Edelbrock 1406 donated by a friend), the intake leak went away. Apparently the leak was coming from the carburetor itself. Thank God it wasn't the intake manifold.
Still left to conquer is a smallish oil leak eminating from the driver-side valve cover, and an ever-so-slight water leak. I can't wait to find the time to fix these pesky problems.

e'mail me.


All pictures & material Copyright © 2005 Donnie Frank